
Stuffed peppers have been around forever, showing up on dinner tables since the 1950s. What makes them stick around? They’re basically edible bowls filled with everything good – ground beef, rice, melted cheese, and tangy tomato sauce all baked together until the peppers get sweet and tender. The best part is you can prep them ahead, freeze individual portions, and have a real meal ready whenever you need it. This version uses a simple trick to keep the beef extra juicy and adds plenty of cheese because, honestly, who’s counting?
Why cutting peppers lengthwise changes everything
Most people cut the tops off peppers and stuff them standing up, but slicing them in half from stem to bottom makes way more sense. You get bigger openings that are easier to clean out, and more importantly, you can pack in almost twice as much filling. Each half becomes its own perfect serving, which is great if you’re freezing some for later or if people want different amounts. Plus, the flat side sits nicely in the baking dish without tipping over and spilling everywhere.
The other advantage nobody talks about is how much more of that crispy, browned cheese top you get. When peppers stand upright, only the small opening gets that golden crust. Cut them lengthwise and suddenly the whole top surface area is covered in bubbling, slightly crispy cheese. The peppers also cook more evenly this way since heat reaches all sides at once. Pre-roasting the peppers for about 20 minutes before stuffing ensures they get tender without turning mushy.
The baking soda trick that keeps beef tender
Here’s something most recipes skip: mixing your ground beef with a tiny amount of baking soda before cooking makes it stay way more tender and juicy. Just a quarter teaspoon mixed with the meat and left to sit for 20 minutes changes how the proteins behave when they hit heat. The baking soda raises the pH level slightly, which means the meat doesn’t tighten up and squeeze out all its moisture during cooking. You end up with beef that’s still tender even after it bakes for over an hour.
This technique works especially well with lean ground beef, which tends to dry out faster than fattier options. Mix the beef with your hands until the baking soda is evenly distributed, then let it sit while you prep your peppers and other ingredients. The difference is noticeable – the filling stays moist and never gets that tough, dry texture that sometimes happens with stuffed peppers. You can use this same trick for meatballs, meat sauce, or any ground beef recipe where you want extra tenderness.
Pick your peppers based on what you actually like
Green peppers show up in most old-school stuffed pepper recipes because they’re cheap, but they’re actually just unripe peppers with a bitter, grassy taste that lots of people don’t enjoy. Red, orange, and yellow peppers cost more, but they’re sweeter and way more pleasant to eat. They’re the same plant as green peppers, just left on the vine longer until they ripen fully. That extra growing time converts starches to sugars, which is why they taste completely different.
If you’re cooking for kids or anyone who says they don’t like peppers, stick with red or orange ones. The sweetness balances out the savory beef filling really nicely. You can also mix colors for a prettier presentation – it doesn’t affect the cooking time since they’re all the same thickness. Look for peppers that feel heavy for their size, with tight, shiny skin and no soft spots. The shape matters too – pick ones that sit flat when you cut them in half, or slice a tiny bit off the bottom to give them a stable base in your baking dish.
Using leftover rice makes this even easier
One of the best things about stuffed peppers is they’re perfect for using up rice from takeout or whatever you made earlier in the week. Cold, day-old rice actually works better than fresh because the grains are firmer and won’t turn mushy during baking. You need about one and a half cups of cooked rice, which is roughly what you get from half a cup of uncooked rice. White rice is traditional, but brown rice, quinoa, or even leftover risotto all work fine.
If you don’t have leftover rice sitting around, those microwavable pouches are totally acceptable here. Nobody will know the difference once everything’s mixed with beef, cheese, and tomato sauce. Regular long-grain white rice gives you the classic texture, but switching to wild rice or farro adds a nuttier taste and chewier bite. Just make sure whatever grain you use is fully cooked before mixing it into the filling – it won’t cook much more in the oven since it’s surrounded by meat and only gets heat from the outside.
The cheese situation needs two types
Using two different cheeses instead of just one gives you better results. Parmesan mixed into the filling adds a salty, sharp taste throughout, while a melty cheese on top (Monterey Jack, Cheddar, or an Italian blend) gives you those stretchy, gooey strings everyone loves. The Parmesan should be freshly grated from a block, not the powdery stuff in the green can – it actually melts into the meat mixture and adds way more depth. You need about a third of a cup mixed in.
For the topping, use a full cup split between covering the peppers before the final bake. Some goes on before you cover everything with foil, then the rest gets sprinkled on for the last 10 minutes of uncovered baking. This creates layers of melted cheese throughout instead of just a cap on top. Monterey Jack melts smoother than Cheddar and has a milder taste that doesn’t compete with the beef. Pepper Jack works great if you want a little heat. Pre-shredded cheese from a bag is fine here, though block cheese you shred yourself melts better since it doesn’t have the anti-caking coating.
Tomato sauce both inside and under the peppers
You need about three cups of tomato sauce total for this recipe. Part of it goes into the meat filling to keep everything moist and add tomatoey goodness, while the rest gets spread in the bottom of your baking dish mixed with sliced onions and a little beef broth. This creates a cooking liquid that steams the peppers from underneath and gives you bonus sauce to spoon over everything when serving. Chunky marinara works better than smooth sauce since it has more texture and often includes herbs already.
The onions and beef broth in the bottom layer might seem random, but they add so much to the final dish. The onions soften and caramelize slightly, mixing with the tomato sauce to create this sweet, rich base. The beef broth thins things out just enough so the sauce doesn’t scorch during the long baking time. Some recipes tell you to boil peppers first, but roasting them in this sauce bath works way better. They absorb some of the liquid, get perfectly tender, and you end up with an amazing sauce that’s absorbed all the pepper sweetness and beef drippings.
Getting the seasoning right in the filling
The filling needs a good amount of seasoning since it’s basically a meatloaf mixture going into bland peppers. Salt is obviously important – you need about two teaspoons total, split between the initial beef mixture and what you add when cooking. But the real character comes from garlic, Italian seasoning, and a pinch of red pepper flakes. Fresh garlic (about four cloves, minced) beats garlic powder by a mile. It gets slightly cooked when you brown the meat, which mellows the harshness but keeps that punchy garlic taste.
Italian seasoning is just a mix of dried oregano, basil, thyme, and sometimes rosemary – you can make your own or use a store-bought blend. It gives the filling that familiar Italian-American restaurant vibe. The red pepper flakes are optional but add a subtle warmth in the background that makes everything taste more interesting. Fresh parsley stirred in at the end brightens everything up and adds flecks of green throughout the filling. About a quarter cup of chopped parsley is perfect, though you can use basil if that’s what you have.
Covering with foil prevents dried-out tops
The peppers need to bake covered for most of the time so they steam and get tender without the tops drying out. A piece of parchment paper goes on first (some recipes skip this, but it keeps the foil from touching the acidic tomato sauce), then aluminum foil wrapped tightly over your baking dish. This traps moisture and creates a mini steam oven that cooks everything evenly. The peppers should bake covered for about 30-35 minutes at 375 degrees.
After that initial covered baking, you remove the foil and parchment so the cheese on top can brown and get slightly crispy. Another 10-15 minutes uncovered does the trick. The peppers should be soft enough to cut with a fork, the beef cooked through (it’ll register 160 degrees if you check with a thermometer), and the cheese bubbling with brown spots. Put your baking dish on top of a sheet pan before it goes in the oven – the tomato sauce sometimes bubbles over and you don’t want that mess on your oven floor. Let everything rest for five minutes after baking so the filling sets up slightly and doesn’t spill out everywhere when you serve it.
Make ahead and freeze for easy future dinners
Stuffed peppers are perfect for making a big batch and freezing individual portions. You can prep everything up through filling the peppers, then freeze them before baking. Wrap each stuffed pepper half individually in plastic wrap, then put them all in a freezer bag. They’ll keep for about three months. When you want to eat them, put however many you need in a baking dish with some tomato sauce, cover with foil, and bake from frozen – just add an extra 15-20 minutes to the covered baking time.
You can also fully cook the peppers, let them cool completely, and then freeze them. This works better if you’re reheating just one or two portions since they warm up faster when already cooked. Either way, stuffed peppers reheat really well – way better than most casseroles or baked dishes. The peppers themselves hold their shape, the filling stays moist, and everything tastes pretty much like it just came out of the oven. Reheat in a covered dish with a splash of water or extra sauce to keep things from drying out. They’re also great cold straight from the fridge if you’re into that.
Stuffed peppers check all the boxes for a solid weeknight dinner – they’re filling, use simple ingredients most people already like, and you can customize them a million different ways. Make them once and you’ll probably add them to your regular rotation, especially once you figure out your own favorite tweaks. They’re the kind of recipe that gets better the more you make it since you learn exactly how you like your peppers cooked and how much cheese is the right amount (which is always more than you think).
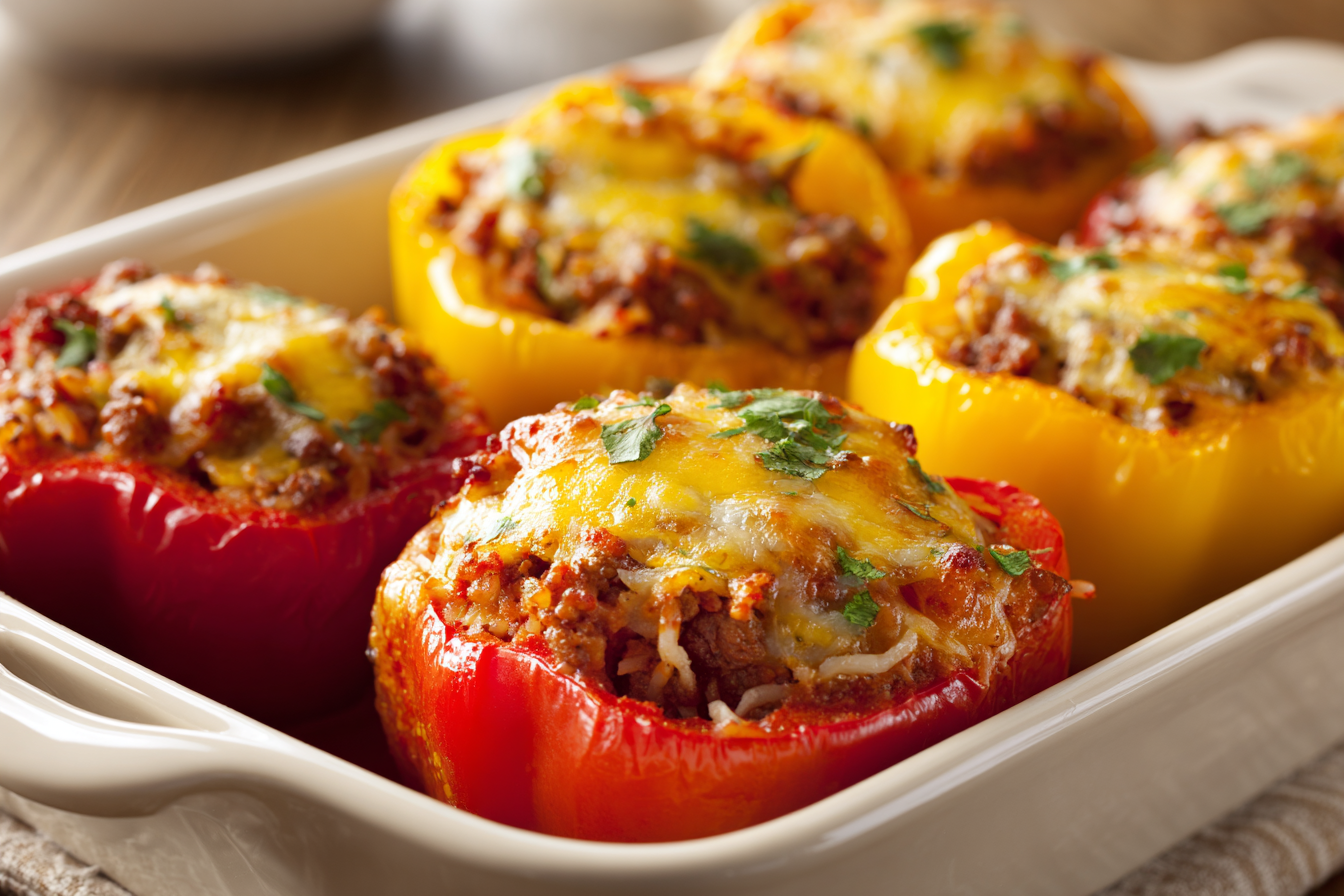
Cheesy Stuffed Peppers with Beef and Rice
Cuisine: American6
servings20
minutes1
hour20
minutes376
kcalSweet bell peppers stuffed with seasoned ground beef, rice, and tons of melted cheese baked in tomato sauce until tender.
Ingredients
6 large bell peppers (red, orange, or yellow)
1½ pounds lean ground beef
¼ teaspoon baking soda
2¼ teaspoons salt, divided
3 tablespoons olive oil, divided
1 medium onion, finely diced
4 cloves garlic, minced
1½ teaspoons Italian seasoning
¼ teaspoon red pepper flakes
3 cups marinara sauce, divided
½ cup beef broth
1½ cups cooked white rice
⅓ cup freshly grated Parmesan cheese
1½ cups shredded Monterey Jack cheese, divided
¼ cup chopped fresh parsley
Directions
- Preheat your oven to 375°F and place a rack in the middle position. In a medium bowl, combine the ground beef with 1 teaspoon of salt and the baking soda, mixing thoroughly with your hands until evenly distributed. Let this mixture sit for 20 minutes while you prepare the other ingredients – this tenderizes the meat and keeps it juicy during cooking.
- While the beef rests, slice each bell pepper in half lengthwise from stem to bottom. Remove the seeds and membranes with your hands or a small knife, then trim a thin slice from the bottom of each half so they sit flat. Pour 2½ cups of marinara sauce into a 9×13-inch baking dish, add the diced onion (reserving some for the filling), beef broth, and a pinch of red pepper flakes, spreading everything evenly across the bottom.
- Place the pepper halves cut-side up in the baking dish with sauce. Drizzle them with 1 tablespoon of olive oil and sprinkle with ¼ teaspoon of salt. Roast the peppers for 20 minutes until they’re tender-crisp and starting to brown slightly – some liquid may accumulate inside them, which is normal and will drain during the final bake.
- While peppers roast, heat the remaining 2 tablespoons of oil in a large skillet over medium heat. Add the remaining diced onion and cook for 3-4 minutes, stirring frequently, until soft and translucent. Add the minced garlic and cook for 1 minute more, being careful not to let it brown. Increase heat to medium-high and add the beef mixture, Italian seasoning, remaining teaspoon of salt, and red pepper flakes.
- Break up the beef with a wooden spoon and cook until browned and almost cooked through, about 5 minutes. Add the remaining ½ cup of marinara sauce and bring everything to a boil, then reduce heat to medium-low and simmer for 2-3 minutes until the meat is fully cooked. Remove the skillet from heat.
- Stir the cooked rice, Parmesan cheese, ¾ cup of the Monterey Jack cheese, and chopped parsley into the beef mixture until the cheese melts and everything is well combined. The filling should be moist but not soupy – if it seems dry, add a splash more marinara sauce.
- Remove the pre-roasted peppers from the oven and divide the beef filling evenly among them, packing it in gently but firmly. Sprinkle the remaining ¾ cup of Monterey Jack cheese over the tops of all the stuffed peppers. Cover the baking dish tightly with aluminum foil, placing it on top of a baking sheet to catch any drips.
- Bake covered for 30-35 minutes, then remove the foil and continue baking for 10-15 minutes more until the cheese is melted, bubbling, and starting to brown in spots. The peppers should be very tender and the filling heated through. Let rest for 5 minutes before serving, spooning some of the tomato sauce from the bottom of the pan over each pepper.
Notes
- Red, orange, or yellow peppers work best since they’re sweeter than green peppers. Green peppers are unripe and have a bitter taste that many people don’t enjoy.
- Leftover rice from takeout or previously cooked rice works perfectly here. You can also use microwaveable rice pouches for convenience.
- The baking soda step is important for keeping the beef tender – don’t skip it even though it seems weird.
- These freeze beautifully either before or after baking. Wrap individual portions and freeze for up to 3 months.
- Ground turkey or Italian sausage can replace the beef if you prefer. A mix of beef and sausage is especially good.
Common questions about making stuffed peppers
Q: Do I really need to pre-cook the peppers before stuffing them?
A: Yes, peppers need a head start or they won’t get tender enough during the covered baking time. Roasting them for 20 minutes before filling ensures they’re soft and sweet by the time the filling is done. Boiling works too but roasting tastes better.
Q: Can I use raw rice instead of cooked rice in the filling?
A: No, the rice needs to be fully cooked before mixing it into the filling. Raw rice won’t cook through properly since it’s surrounded by meat and only gets indirect heat. Use leftover rice or make fresh rice according to package directions.
Q: Why is my filling dry even though I followed the recipe?
A: This usually happens if you use extra-lean ground beef or don’t add enough sauce. Make sure you’re using 90% lean beef (not 93% or leaner), and don’t skimp on the marinara sauce mixed into the filling. The filling should look quite moist before it goes into the peppers.
Q: How do I keep the cheese from burning on top?
A: Keep the peppers covered with foil for most of the baking time, only removing it for the last 10-15 minutes. If your oven runs hot or the cheese is browning too fast, tent a piece of foil loosely over the top until the peppers finish cooking.