
There’s something about a Caesar salad that just works. The creamy dressing, the crunch of romaine, that salty hit of Parmesan—it’s perfect on its own. But what if you could take all that goodness and wrap it up with crispy chicken in a warm tortilla that gets toasted until golden? That’s exactly what this Crispy Chicken Caesar Wrap does, and honestly, it might just make every other lunch seem boring. It’s got everything you want in one handheld package, and once you make it, you’ll wonder why you ever settled for anything less.
Why this wrap beats a regular salad
Caesar salads are great, but let’s be real—they can be a little boring after the first few bites. You’re stuck with a fork, everything slides around, and by the time you’re halfway through, you’re kind of over it. This wrap changes all that by giving you the same great taste but in a way that’s way more satisfying to eat. The tortilla holds everything together, so you get a perfect bite every single time.
Plus, there’s that final step where you toast the whole thing in a hot skillet. That’s what takes this from good to absolutely amazing. The outside gets crispy and golden brown, and the inside stays cool and creamy. It’s the contrast that makes it so good—hot and cold, crunchy and smooth, all in one bite. Once you try it this way, going back to a regular salad just feels like settling.
The homemade Caesar dressing makes all the difference
Sure, you could use bottled dressing, but making your own takes this wrap to another level. The recipe uses real anchovies, egg yolk, fresh garlic, and Parmesan to create something that’s rich, tangy, and way better than anything from a bottle. It might sound fancy, but it’s actually super simple—just whisk everything together and slowly drizzle in olive oil until it gets thick and creamy.
The anchovies are key here, even if they sound weird. They don’t make it taste fishy at all—they just add this deep, savory flavor that bottled dressings can’t match. If you’ve never used anchovies before, this is the perfect recipe to try them in. They basically melt into the dressing and give it that authentic Caesar taste. Once you make it from scratch, you’ll never want to go back to store-bought.
Getting that perfect crispy chicken coating
The chicken in this wrap isn’t just good—it’s insanely crispy. The secret is a simple breading process using seasoned flour and panko breadcrumbs. You dredge the chicken in flour mixed with garlic powder, cumin, and paprika, then dip it in beaten eggs, and finally coat it in panko. That double layer creates a crust that’s golden and crunchy on the outside while keeping the chicken juicy inside.
Frying it in oil heated to 350°F is important—if the oil’s not hot enough, the chicken will absorb too much oil and get greasy instead of crispy. But if you want a lighter option, you can absolutely bake or air fry it instead. Just make sure to spray the breaded chicken with oil first so it still gets that golden color and crunch. Either way, you’ll end up with chicken that’s way better than anything you’d get from a restaurant.
Bacon adds the perfect salty crunch
Bacon isn’t technically required for a Caesar, but once you add it to this wrap, you’ll never want to leave it out. It brings this salty, smoky crunch that pairs perfectly with the creamy dressing and crispy chicken. Just cook it in a pan until it’s nice and crispy, then drain it on paper towels and break it into big pieces. Don’t chop it too small—you want those chunks of bacon in every bite.
The combination of bacon and chicken might seem like overkill, but trust me, it works. The bacon adds another layer of texture and flavor that makes the whole thing feel more indulgent. If you’re trying to keep things lighter, you could skip it, but honestly, life’s too short to skip bacon when it makes something this good even better.
How to wrap it so nothing falls out
There’s nothing worse than a wrap that falls apart halfway through eating it. The trick is to not overfill it and to fold it the right way. Start by warming your tortilla so it’s soft and pliable—either in a dry pan for a few seconds or in the microwave. Then spread a tablespoon of dressing down the center and layer your dressed lettuce, bacon, sliced chicken, and shaved Parmesan in a line.
To fold it, start by folding the bottom edge up over the filling, then fold in both sides and roll it away from you into a tight cylinder. The key word is tight—don’t leave any gaps or it’ll come loose. Once it’s rolled, place it seam-side down in a hot skillet. That first minute or two of toasting seals the edge and makes sure everything stays put when you pick it up.
Toasting the wrap is what seals the deal
This step is what takes the wrap from regular to restaurant-quality. After you roll it up, put it seam-side down in a hot, dry skillet and let it toast for one to two minutes per side. The tortilla gets golden and crispy, and the heat warms everything inside just enough that the flavors start to come together. It also helps seal the wrap so it doesn’t fall apart when you eat it.
Don’t rush this part—let it sit without moving it so it gets that nice brown color. You’ll know it’s ready when the outside feels crispy and you can smell the tortilla toasting. That contrast between the warm, crispy outside and the cool, creamy inside is what makes this wrap so addictive. It’s the kind of thing that makes you want to make it again the next day.
You can prep most of it ahead
One of the best things about this recipe is that you can do a lot of the work ahead of time. The Caesar dressing can be made up to three days in advance and stored in the fridge, which means you’re halfway done before you even start. You can also cook the chicken and bacon ahead and keep them in the fridge until you’re ready to assemble everything.
Just be careful not to assemble the wraps too far in advance—the ingredients are pretty moist, so if they sit wrapped up for more than a few hours, the tortilla will get soggy. It’s best to put everything together right before you’re ready to eat. But having the components ready to go makes it super easy to throw together a quick lunch or dinner without a lot of work.
What to serve on the side
This wrap is pretty filling on its own, but if you want to make it a full meal, there are plenty of good options. Crispy roasted potatoes are a great match—they’ve got that same satisfying crunch and go perfectly with the creamy dressing. You could also do sweet potato fries or regular fries if you want something a little more classic.
If you’re in the mood for something lighter, a simple tomato soup is amazing with this wrap. The creamy, tangy soup complements the rich dressing, and you can dip the wrap right into it if you want. And if you’re feeling like you need dessert, something like chocolate chip cookies or brownies rounds out the meal without being too heavy.
Why rotisserie chicken is your shortcut
If you don’t feel like frying chicken from scratch, rotisserie chicken from the store is a total game-changer. Just grab one on your way home, shred or chop the meat, and you’re halfway done. It’s already cooked and seasoned, so all you have to do is warm it up or use it cold. Either way works great in this wrap.
You could also use leftover grilled chicken or even those frozen breaded chicken strips if you’re in a pinch. The point is, you don’t have to make everything from scratch to end up with something that tastes amazing. The dressing and the toasted tortilla do most of the heavy lifting, so even with shortcuts, you’ll still end up with a wrap that’s way better than anything you’d buy.
This Crispy Chicken Caesar Wrap is one of those recipes that seems almost too simple to be as good as it is. But once you try it, you’ll get why it’s worth making over and over. It’s quick, it’s satisfying, and it turns a regular Caesar salad into something you’ll actually crave. Whether you make it for lunch, dinner, or just because you’re hungry, it’s the kind of meal that never gets old.
Crispy Chicken Caesar Wrap
Cuisine: American1
wraps15
minutes15
minutes1029
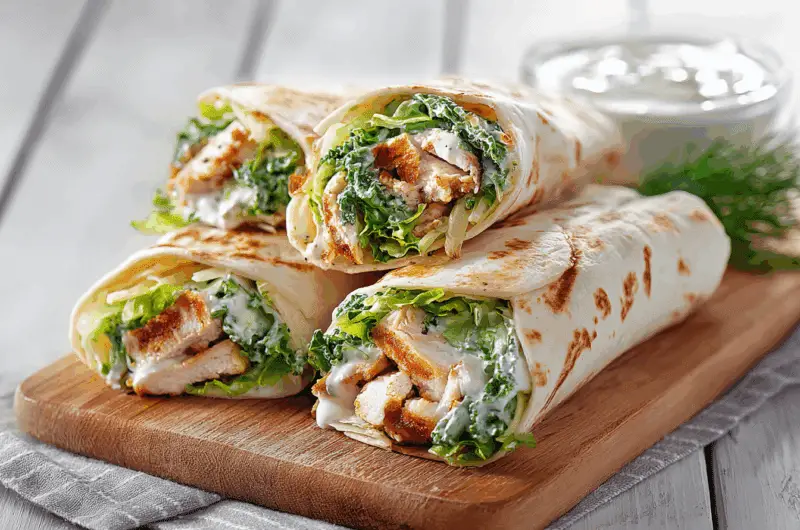
kcalThis crispy chicken Caesar wrap combines golden breaded chicken, crisp romaine, salty bacon, and homemade Caesar dressing all wrapped up and toasted until perfectly golden.
Ingredients
1/3 tablespoon anchovies, finely chopped
1.5 garlic cloves, finely chopped
1 1/2 teaspoons dijon mustard
1 teaspoon Worcestershire sauce
1 tablespoon lemon juice
1 large egg yolk
2 1/4 tablespoons extra virgin olive oil
2 tablespoons finely grated parmesan cheese
Freshly ground black pepper to taste
1/2 cup all-purpose flour
1/2 teaspoon garlic powder
1/4 teaspoon ground cumin
1/4 teaspoon paprika
Salt and pepper to taste
3.5 ounces boneless chicken breast
3 large eggs, beaten
1 cup panko breadcrumbs
2 tablespoons oil for frying
2 slices bacon
1 cup chopped romaine lettuce
1 large wheat tortilla
Shaved Parmesan to serve
Directions
- Start by making the Caesar dressing in a small bowl. Add the finely chopped anchovies, garlic, dijon mustard, Worcestershire sauce, lemon juice, and egg yolk. Whisk everything together thoroughly until it’s well combined. The anchovies should start to break down and blend into the mixture, creating a smooth base for your dressing.
- While whisking continuously, very slowly drizzle in the olive oil in a thin, steady stream. This is the key step for getting a creamy, emulsified dressing—if you pour too fast, it won’t come together properly. Keep whisking until the dressing becomes thick and smooth. Once it’s emulsified, stir in the grated Parmesan cheese and add a pinch of black pepper. Set the dressing aside while you prepare the rest of the ingredients.
- In a shallow bowl, mix together the all-purpose flour, garlic powder, cumin, paprika, salt, and pepper until everything is evenly distributed. This seasoned flour mixture will give your chicken great flavor even before it gets breaded. Make sure all the spices are well mixed so every piece of chicken gets coated evenly.
- Take your chicken breast and dredge it first in the seasoned flour mixture, making sure to coat all sides. Then dip it completely into the beaten eggs, letting any excess drip off. Finally, press the chicken firmly into the panko breadcrumbs, coating it thoroughly on all sides. The panko should stick well to the egg-coated chicken, creating a thick, even layer that will get super crispy when fried.
- Heat the oil in a large skillet over medium-high heat until it reaches 350°F. You can test it by dropping in a pinch of panko—if it sizzles immediately, the oil is ready. Carefully place the breaded chicken in the hot oil and fry for four to five minutes per side, or until it’s golden brown, crispy, and cooked all the way through. The internal temperature should reach 165°F. Transfer the cooked chicken to a paper towel-lined plate to drain any excess oil, then let it cool slightly before slicing.
- While the chicken is cooling, cook the bacon in a separate pan over medium heat. Let it cook until it’s nice and crispy, flipping it once or twice to make sure both sides get evenly browned. Once it’s done, transfer the bacon to paper towels to drain, then break it into large, bite-sized pieces. Don’t chop it too small—you want those chunks of bacon to add texture and flavor to every bite of your wrap.
- In a medium bowl, toss the chopped romaine lettuce with about two tablespoons of the homemade Caesar dressing. Make sure the lettuce is well coated—this is what gives it that classic Caesar flavor. Slice the slightly cooled chicken into strips. Now you’re ready to assemble your wrap.
- Warm your tortilla either in a dry pan over medium heat for about 15 to 30 seconds per side, or in the microwave for a few seconds until it’s soft and pliable. Spread one tablespoon of Caesar dressing down the center of the tortilla. Layer the dressed lettuce, crispy bacon pieces, sliced chicken, and shaved Parmesan on top in a line down the middle. Fold the bottom edge of the tortilla up over the filling, then fold in both sides and roll it tightly away from you into a secure cylinder.
- Heat a clean, dry skillet over medium heat. Place the wrap seam-side down in the skillet and let it toast for one to two minutes without moving it. This helps seal the edge and creates a crispy, golden exterior. Flip the wrap over and toast the other side for another one to two minutes until both sides are golden brown and crispy. Remove from the skillet, cut in half if desired, and serve immediately while it’s still warm and crunchy.
Notes
- For the creamiest dressing, drizzle the olive oil in very slowly while whisking constantly to create a stable emulsion that won’t separate.
- Use panko breadcrumbs instead of regular breadcrumbs for a lighter, crunchier crust on the chicken.
- Make sure your frying oil is fully heated to 350°F before adding the chicken to prevent it from absorbing too much oil and becoming greasy.
- Avoid overfilling the wrap and roll it tightly, then toast seam-side down first to help seal the edge and keep it from falling apart.
- The Caesar dressing can be made up to three days in advance and stored in an airtight container in the fridge.
- If you want a lighter option, you can bake the chicken at 400°F for 15 to 20 minutes or air fry at 400°F for 10 to 12 minutes, making sure to spray it with oil first for crispiness.
Frequently asked questions
Q: Can I use store-bought Caesar dressing instead of making my own?
A: Yes, you can definitely use bottled Caesar dressing if you’re short on time. Just keep in mind that homemade dressing has a much richer, more authentic taste. If you do use store-bought, try to find a good quality brand that uses real ingredients. You can also add a little extra lemon juice or Parmesan to boost the flavor.
Q: Is it safe to use raw egg yolk in the dressing?
A: To be safe, it’s best to use pasteurized eggs when making Caesar dressing with raw egg yolk. Pasteurized eggs are gently heated to kill any bacteria but are still safe to use raw. You can find them at most grocery stores, usually labeled as pasteurized. If you can’t find them, you can also use a store-bought Caesar dressing instead.
Q: Can I make these wraps ahead of time?
A: You can prep all the components ahead—cook the chicken and bacon, make the dressing, and wash the lettuce—but it’s best not to assemble the wraps until you’re ready to eat them. The ingredients are pretty moist, so if the wrap sits assembled for too long, the tortilla will get soggy. If you do need to make them ahead, try to keep it under a few hours.
Q: What can I use instead of panko breadcrumbs?
A: Regular breadcrumbs will work, but they won’t be quite as crispy as panko. You could also try crushed cornflakes or even crushed crackers for a different texture. If you’re looking for a gluten-free option, there are gluten-free panko breadcrumbs available at most stores that work just as well as the regular kind.