
Most people think getting crispy chicken skin at home is impossible, but that’s actually a myth. The secret isn’t some fancy technique or expensive equipment. It comes down to understanding a few simple tricks about heat, timing, and the right cooking vessel. Bone-in, skin-on chicken thighs are incredibly forgiving and way more affordable than chicken breasts, making them perfect for weeknight dinners. Plus, they stay juicy even if your timing isn’t perfect, which takes a lot of pressure off when you’re trying to get everything on the table at once.
Why your chicken skin turns out soggy
The main reason chicken skin gets soggy is moisture. When you cook chicken in a glass dish, it doesn’t get hot enough to really crisp up the skin. Glass just doesn’t radiate heat the same way metal does. Meanwhile, all those natural juices from the chicken pool around in the pan, basically steaming the skin instead of crisping it. It’s like trying to make toast in a humid bathroom – the moisture works against what you’re trying to accomplish.
The fix is surprisingly simple: switch to cast iron or stainless steel. These materials get much hotter and help any liquid evaporate quickly instead of sitting there making everything soggy. Another huge mistake people make is covering the chicken while it cooks. That traps all the steam right where you don’t want it. Keep your chicken uncovered the entire time it’s in the oven, and you’ll see a massive difference in how crispy that skin gets.
Getting the oven temperature right matters more than you think
Starting at 400 degrees Fahrenheit is the sweet spot for chicken thighs. This temperature is hot enough to brown the skin nicely without burning it before the inside cooks through. Some recipes tell you to crank it up to 450 or even 500, but that often leads to burnt skin with raw meat near the bone. Nobody wants that situation. The 400-degree starting point gives you enough heat for browning while still cooking the meat evenly all the way through.
After about 45 minutes at 400 degrees, dropping the temperature to 325 degrees for the final 10-15 minutes lets the inside finish cooking without overdoing the skin. This two-temperature method is what separates okay chicken from restaurant-quality chicken. The internal temperature should hit 165 degrees Fahrenheit when measured at the thickest part of the thigh. If you really want that extra-crispy skin, turn on the broiler for just 2-3 minutes at the very end, but watch it carefully because it can go from perfect to burnt in seconds.
How garlic transforms from sharp to sweet
Raw garlic is pretty intense and can overpower everything else on your plate. But when you roast whole garlic cloves alongside chicken thighs, something magical happens. The high heat breaks down all those sharp, pungent compounds and converts the natural sugars into something sweet and almost buttery. Those roasted cloves become soft enough to spread like butter and taste nothing like raw garlic. Some people even eat them whole right off the pan because they’re that good.
Using a full head of garlic (about 30 cloves) might seem like overkill, but it’s really not. The roasted garlic infuses the chicken drippings with incredible depth without being overwhelming. Just peel the cloves and give them a light press with the flat side of a knife to release some of their oils. They’ll roast right alongside the chicken, turning golden brown and tender. If you’re worried about peeling that many cloves, there’s a trick: put the whole head in a bowl, cover it with another bowl, and shake vigorously for 30 seconds. Most of the peels will come right off.
Fresh herbs versus dried herbs in roasting
Fresh rosemary and sage are traditional with roasted chicken for good reason – they hold up well under high heat and their piney, earthy notes complement the rich meat perfectly. But let’s be realistic: fresh herbs aren’t always in the fridge, and they can get pricey if you’re only using a little bit. Dried herbs work just fine for this recipe. The general rule is to use about half the amount of dried herbs compared to fresh since dried herbs are more concentrated. So if a recipe calls for 2 teaspoons of fresh rosemary, use 1 teaspoon of dried instead.
Other herbs that work great include thyme, oregano, and even a sprinkle of herbs de Provence if that’s what’s in your cabinet. Some people add a bit of smoked paprika for color and a subtle smoky taste. The herb mixture gets sprinkled right on the chicken before it goes in the oven, and as the chicken roasts, those herbs get toasted and their oils release into the drippings. If you have fresh parsley on hand, save that for garnishing at the end since it doesn’t need to cook and adds a nice bright green color to your finished dish.
Why bone-in chicken thighs are worth the extra money
Boneless, skinless chicken thighs are convenient, sure, but they dry out way faster and don’t develop that crispy exterior everyone loves. The bone actually helps conduct heat to the center of the meat, ensuring even cooking. Plus, bones add extra richness to any pan drippings, which you can turn into a simple sauce. The skin protects the meat from direct heat while rendering out its fat, which then bastes the chicken as it cooks. It’s like a self-basting system that you didn’t have to engineer.
Chicken thighs with bone and skin are usually cheaper per pound than boneless, skinless breasts anyway. An average chicken thigh weighs about 6 ounces, and four thighs easily feed a family. Even if you overcook them slightly, they stay moist because of the higher fat content compared to breast meat. That extra fat is also what makes them taste so much better. Chicken breasts can be bland and rubbery if you’re even 30 seconds late taking them out of the oven, but thighs forgive timing mistakes much more generously.
Turning pan drippings into an easy sauce
After you take the chicken out of the pan, you’re left with all these amazing drippings that are packed with flavor from the herbs, garlic, and chicken fat. Don’t throw that away! You can make a quick pan sauce in about two minutes. Just put the pan back on the stove over medium heat and add about a third of a cup of chicken broth. Use a whisk to scrape up all the browned bits stuck to the bottom – that’s where tons of the taste is hiding.
To thicken the sauce slightly, mix three-quarters of a teaspoon of cornstarch with the cold broth before adding it to the pan. Whisk constantly for about a minute until it thickens just a bit, then remove from heat and stir in a tablespoon of lemon juice. That acid brightens everything up and cuts through the richness. Some people pour this pan sauce directly over the chicken, but if you want to keep that skin crispy, serve the sauce on the side or drizzle it around the chicken on the plate instead of on top.
Getting your chicken ready before it hits the oven
One step that makes a noticeable difference is patting the chicken skin completely dry with paper towels before seasoning. Wet skin will steam instead of crisp, so take an extra minute to really dry it off. Some people even leave the chicken uncovered in the fridge for a few hours or overnight to air-dry the skin, which makes it even crispier, but that’s not necessary if you’re short on time. Just make sure it’s dry before you season it and put it in the pan.
Seasoning both sides of the chicken matters too. Salt and pepper should go on the underside and the top, but the herbs and garlic powder only need to go on the skin side since that’s what you’ll be looking at when it’s done. Arranging the chicken skin-side up in your pan ensures that’s the side that gets the most direct heat and becomes golden brown. The garlic cloves can be scattered around the chicken pieces – they’ll roast in the fat that renders out and pick up all those herb flavors too.
Making this recipe work with what’s in your kitchen
This recipe is super flexible, which is part of why it’s so practical for regular weeknight cooking. Don’t have rosemary? Use thyme or oregano instead. No fresh lemon? Skip it or use a splash of white wine vinegar in the pan sauce. The basic method of roasting bone-in, skin-on chicken thighs at high heat works with almost any herb or spice combination you can think of. Some people use everything bagel seasoning, others go with Italian seasoning blend, and it all turns out great.
If you want to add vegetables, throw in some small potatoes at the start since they take about the same time to cook. Quicker-cooking vegetables like broccoli or asparagus can go in during the last 15 minutes. The vegetables will roast in the chicken fat and pick up all those herb and garlic notes, essentially giving you a complete meal from one pan. The marinade approach also works if you have time – letting the chicken sit in the olive oil, lemon juice, and herb mixture for 30 minutes to a few hours makes it even more flavorful.
Storing leftovers and keeping them crispy
Leftover chicken thighs will keep in an airtight container in the fridge for about three days. The tricky part is reheating them without turning that crispy skin soggy again. The microwave is your enemy here – it’ll steam the chicken and make the skin rubbery. Instead, reheat the chicken in a 350-degree oven for about 10-15 minutes. Put the pieces on a wire rack set over a baking sheet so air can circulate all around them. This helps the skin crisp back up instead of getting soft.
Another option is reheating in an air fryer if you have one – about 5-7 minutes at 375 degrees does the trick. The skin won’t be quite as crispy as when it was freshly made, but it’ll be pretty close. You can also freeze the cooked chicken if you want to meal prep. Let it cool completely, then freeze in freezer bags for up to three months. Thaw in the fridge overnight before reheating. Some people freeze the uncooked, marinated chicken instead, which works great too – just thaw it completely before baking as directed.
Roasted chicken thighs with garlic and herbs prove that simple ingredients and straightforward techniques can produce restaurant-quality results at home. The combination of crispy skin, tender meat, and aromatic roasted garlic makes this dish satisfying without being complicated. Once you nail the basic method, it becomes one of those reliable recipes you’ll make over and over, changing up the herbs and seasonings based on what sounds good or what needs to get used up in the fridge.
Garlic Herb Roasted Chicken Thighs
Cuisine: American4
servings5
minutes55
minutes186
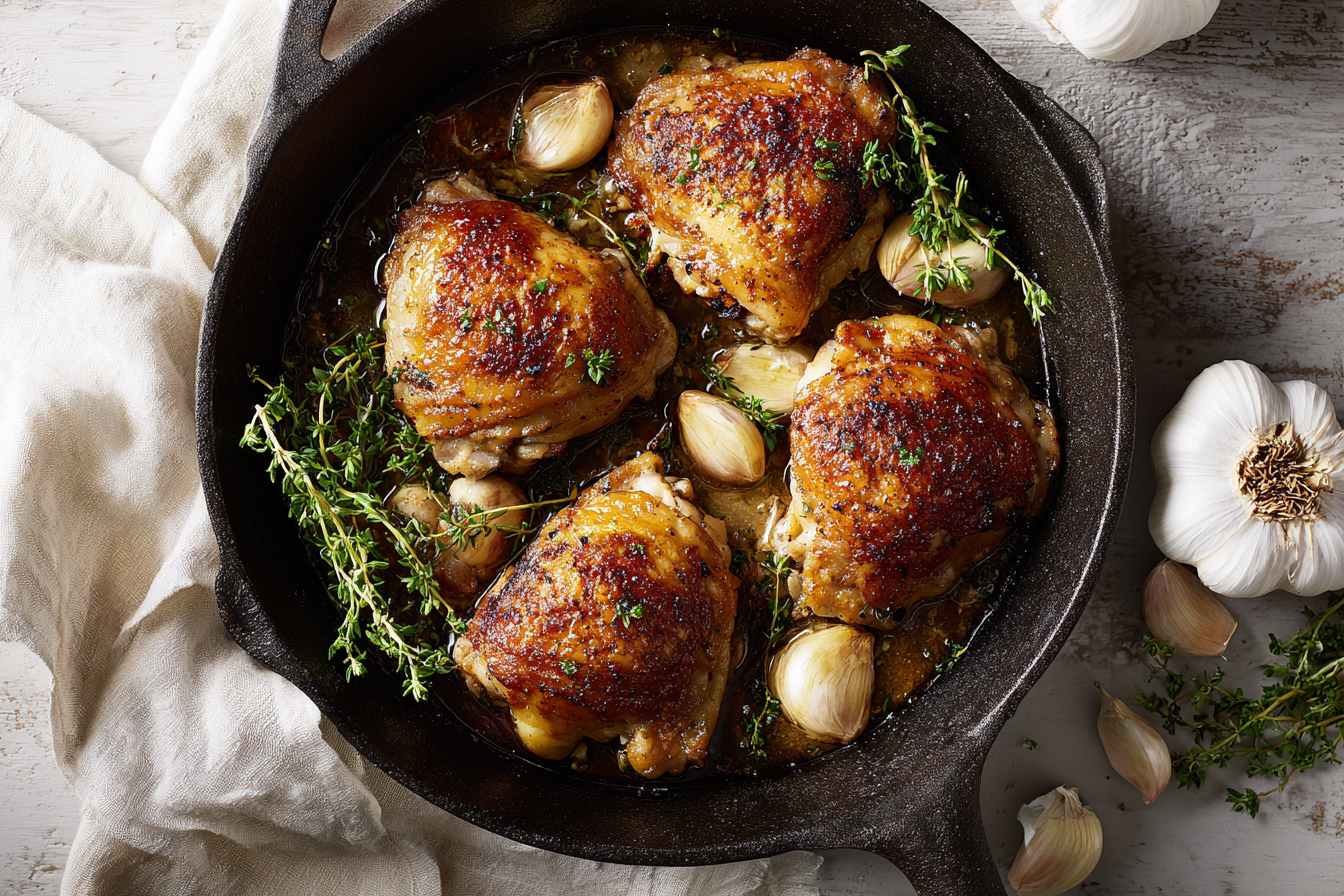
kcalCrispy-skinned chicken thighs roasted with whole garlic cloves, fresh rosemary, and sage for a simple weeknight dinner that tastes like it came from a fancy restaurant.
Ingredients
4 bone-in, skin-on chicken thighs
4-5 garlic cloves, peeled and lightly pressed
1/2 teaspoon dried sage (or 1 teaspoon fresh, chopped)
3/4 teaspoon dried rosemary (or 1.5 teaspoons fresh, chopped)
1/4 teaspoon garlic powder
Salt and black pepper to taste
1 tablespoon fresh parsley, chopped (for garnish)
1/3 cup chicken broth (optional, for pan sauce)
3/4 teaspoon cornstarch (optional, for pan sauce)
Directions
- Preheat your oven to 400 degrees Fahrenheit and position the rack in the center. Choose a cast iron skillet, stainless steel pan, or oven-safe saute pan for the best crispy results. Pat the chicken thighs completely dry with paper towels, paying special attention to the skin side, as any moisture will prevent crisping.
- Season both sides of each chicken thigh generously with salt and black pepper. Place the chicken thighs in your baking pan skin-side up, leaving a little space between each piece. This arrangement ensures the skin gets maximum heat exposure for crisping.
- Sprinkle the garlic powder evenly over the tops of the chicken thighs. Distribute the chopped sage and rosemary over the chicken, then scatter the peeled and pressed garlic cloves around the thighs in the pan. The garlic will roast alongside the chicken, becoming sweet and tender.
- Place the pan on the center rack of your preheated oven and roast uncovered for 45 minutes. Do not cover the pan at any point, as this traps moisture and prevents the skin from crisping. After 45 minutes, reduce the oven temperature to 325 degrees Fahrenheit.
- Continue roasting for another 10-15 minutes at the lower temperature until the internal temperature reaches 165 degrees Fahrenheit when measured at the thickest part of the thigh. The skin should be golden brown and crispy. If you want extra-crispy skin, turn on the broiler for 2-3 minutes at the end, watching carefully to prevent burning.
- Remove the pan from the oven and transfer the chicken thighs and roasted garlic cloves to a serving plate. If making the optional pan sauce, whisk together the chicken broth and cornstarch in a small bowl until smooth.
- Place the pan with the drippings on the stove over medium heat. Pour in the broth mixture and whisk constantly, scraping up any browned bits from the bottom of the pan. Cook for about 1 minute until the sauce thickens slightly, then remove from heat and stir in a tablespoon of lemon juice if desired.
- Serve the chicken thighs with the roasted garlic cloves and garnish with fresh chopped parsley. If using the pan sauce, either drizzle it around the chicken on the plate or serve it on the side to keep the skin as crispy as possible. To keep chicken warm before serving, turn off the oven and cover loosely with foil.
Notes
- Use cast iron or stainless steel pans instead of glass baking dishes for the crispiest skin. These materials conduct heat better and help liquids evaporate quickly.
- Fresh or dried herbs both work well in this recipe. If using dried herbs, use about half the amount called for with fresh herbs since dried are more concentrated.
- This recipe is very versatile with seasonings. Try oregano, thyme, Italian herb blend, herbs de Provence, or even everything bagel seasoning instead of sage and rosemary.
- For meal prep, you can freeze uncooked chicken in the marinade or freeze cooked chicken for up to 3 months. Thaw completely in the refrigerator before cooking or reheating.
- Reheat leftovers in a 350-degree oven for 10-15 minutes on a wire rack to keep the skin crispy, or use an air fryer at 375 degrees for 5-7 minutes.
Frequently asked questions
Q: Can I use boneless, skinless chicken thighs for this recipe?
A: Boneless, skinless thighs will work, but you’ll lose the crispy skin that makes this recipe special. They’ll also cook faster, usually in about 25-30 minutes at 400 degrees, so check them earlier to avoid drying them out. The bone and skin add a lot of flavor and help keep the meat juicy.
Q: Do I need to flip the chicken while it’s roasting?
A: No, leave the chicken skin-side up the entire time. Flipping it would prevent the skin from getting crispy and could cause it to stick to the pan. The bone conducts heat to the underside, so the chicken cooks evenly without needing to be turned.
Q: How do I know when the chicken is fully cooked?
A: Use an instant-read thermometer inserted into the thickest part of the thigh without touching the bone. It should read 165 degrees Fahrenheit. The juices should also run clear, and the skin should be golden brown and crispy.
Q: Can I add vegetables to roast with the chicken?
A: Absolutely. Add potatoes, carrots, or other root vegetables at the beginning since they take about the same time to cook. For quicker-cooking vegetables like broccoli, zucchini, or asparagus, add them during the last 15 minutes of roasting so they don’t get mushy.