
Making a whole roasted chicken at home sounds harder than it actually is. Most people think they need fancy skills or expensive equipment, but that’s not true at all. The real trick is knowing a few simple techniques that make all the difference between dry, boring chicken and something so good your family will ask for it every week. With the right approach, even someone who’s never roasted a chicken before can pull off something that looks and tastes like it came from an expensive restaurant.
Why this method works better than most recipes
Most recipes tell you to just season the outside of the chicken and hope for the best. That approach leaves you with meat that tastes bland once you get past the skin. The better way is to get that seasoning underneath the skin, right onto the meat itself. This technique isn’t complicated at all. You just need to gently separate the skin from the breast meat using your fingers, being careful not to tear it. Once you’ve created that space, you can spread herb butter directly on the meat where it actually matters.
The two-temperature roasting method makes a huge difference too. Starting at a lower temperature lets the inside cook through without drying out. Then cranking up the heat at the end crisps up the skin perfectly. According to this approach, when the internal temperature hits 140°F, that’s when you bump the oven up to 400°F. This simple change means no more choosing between properly cooked meat and crispy skin. You get both every single time without any guesswork or crossing your fingers.
Getting your chicken ready the right way
Before anything else, take the chicken out of the refrigerator about 30 minutes before cooking. This seems like a small thing, but cold chicken going into a hot oven cooks unevenly. The outside gets done while the inside stays raw, which nobody wants. Room temperature chicken cooks more consistently throughout. While it’s sitting out, pull out any giblets from inside the cavity. Some chickens come with them in a little bag, others don’t have them at all. Either way is fine.
Drying the chicken thoroughly matters more than most people realize. Grab a bunch of paper towels and pat down every part of the bird, inside and out. Water on the skin creates steam in the oven, which prevents browning. The drier the chicken, the crispier the skin gets. After drying, season the inside cavity generously with salt and pepper. Many recipes skip this step, but it adds another layer of taste to the meat. Then stuff the cavity with whatever vegetables and herbs you have lying around. Onion pieces, garlic cloves, lemon halves, celery, carrots, or fresh herb sprigs all work great. This isn’t about following a strict recipe, just use what’s in your refrigerator.
Making the herb butter that changes everything
The herb butter is where all the magic happens. Start with room temperature butter, not cold and not melted. It needs to be soft enough to spread easily but still hold together. Mix in chopped fresh herbs like rosemary, thyme, and sage. These hardy herbs hold up well to high heat and don’t turn bitter or lose their taste. Skip soft herbs like basil, parsley, or dill for this recipe since they don’t handle the long cooking time as well. Add salt and pepper to the butter mixture too.
For the herbs, you only need about a tablespoon total of chopped fresh herbs mixed into three tablespoons of butter. Fresh herbs work best, but dried herbs can substitute if that’s what’s available. Just use less since dried herbs pack more concentrated taste. The herb mixture spreads easier if everything is well combined before you start working with the chicken. Some people add garlic to the butter, which tastes good, but keep in mind that raw garlic can burn during the long roasting time. Garlic powder mixed into the butter works better than fresh minced garlic for this particular recipe.
How to get seasoning under the skin without tearing it
This part seems tricky but it’s actually pretty simple once you try it. Start at the neck end of the breast where the skin is loosest. Gently slide your fingers between the skin and the meat, moving slowly and carefully. The skin is tougher than it looks and won’t tear easily if you’re gentle. Work your way down toward the legs, creating a pocket on both sides of the breast. If you’re wearing rings, take them off first since they can catch and rip the skin.
Once the pocket is created, use a spoon to push half the herb butter under the skin on one side. Then use your fingers on the outside to massage and spread the butter evenly over the breast meat. Repeat on the other side with the remaining butter. The goal is getting an even coating so every bite has that herb taste. After the butter is in place, pull the neck skin back over the opening to keep everything sealed in. Cross the legs and tie them together with kitchen twine. This isn’t about making it look fancy; tying the legs keeps them from splaying out and drying out during cooking.
The outside needs attention too
After getting all that herb butter under the skin, the outside still needs some attention. Drizzle olive oil all over the chicken, then rub it into every part with your hands. This helps the skin brown and crisp up nicely. The oil also helps any outside seasonings stick to the bird. Get into all the nooks and crannies, making sure the whole surface gets coated. It might feel messy, but that’s fine. Wash your hands thoroughly with soap and hot water when you’re done handling raw chicken.
Now for the outside seasoning, and this is important: go light. The herb butter under the skin already has salt, and the cavity is seasoned too. Too much salt on the outside makes the skin taste overly salty and unpleasant. Just a light sprinkle of salt, pepper, and some extra chopped herbs is plenty. Some recipes suggest using a lot of outside seasoning, but that’s a mistake. The skin should be crispy and lightly seasoned, not crusty with salt. This approach focuses more on dried herbs mixed with seasonings spread evenly over the surface, which creates a nice crust without being overwhelming.
Temperature matters more than time
Forget about those recipes that tell you to roast for a specific number of minutes per pound. Ovens vary too much, and so do chickens. What matters is internal temperature, not time. Get yourself a good meat thermometer, preferably the kind that stays in the chicken while it cooks and beeps when it reaches the target temperature. Those little plastic pop-up indicators that sometimes come with chickens are useless. They pop up way too late, giving you dry, overcooked meat every time.
Stick the thermometer probe into the thickest part of the breast, angling it toward the center of the meat. Make sure it’s not touching bone, which gives a false reading. Start roasting at 350°F on the middle rack. When the thermometer reads 140°F, increase the oven temperature to 400°F. Keep cooking until the internal temperature hits 160°F, then pull it out immediately. The chicken will continue cooking while it rests, eventually reaching the safe temperature of 165°F. This method guarantees perfectly cooked meat with crispy, golden brown skin every single time.
Resting the chicken isn’t optional
When the chicken comes out of the oven, resist the urge to cut into it right away. Resting is just as important as cooking it properly. During roasting, all the juices get pushed toward the center of the meat. Cutting into it immediately makes those juices run all over the cutting board instead of staying in the meat where they belong. At least 15 minutes of rest time is necessary, though 20 to 30 minutes is even better. The chicken will still be plenty hot after resting.
While the chicken rests, those juices redistribute throughout the meat, making every bite moist and tender. The internal temperature also continues to rise during this time, finishing the cooking process without any extra heat. Some people worry the chicken will get cold, but that doesn’t happen. A whole chicken holds heat really well. After resting, carve the chicken by removing the legs first, then the wings, then slicing the breast meat. The meat should be juicy all the way through, not dry on the edges and only moist in the middle.
What to do with all those pan drippings
Don’t throw away those drippings in the bottom of the pan. They’re liquid gold. All those herbs, butter, and chicken juices combine to create an incredibly rich base for gravy or sauce. The easiest thing to do is just reheat the drippings and pour them over the carved chicken on the serving platter. If there are some burned bits stuck to the bottom of the pan, that’s fine. Those add even more depth to the sauce.
For a quick pan sauce, put the roasting pan on the stovetop over medium heat. Add a cup of chicken broth and scrape up all those browned bits from the bottom. Let it simmer for a few minutes until slightly reduced. If the drippings seem too greasy, spoon off some of the fat from the top first. The sauce doesn’t need to be thickened or complicated. Just those simple pan juices poured over the chicken make everything taste even better. Serve with sliced baguette on the side for soaking up every last drop. Trust me, you’ll want bread for this.
Leftover chicken is actually a good thing
A whole roasted chicken usually feeds four people for dinner, but any leftovers are perfect for other meals. Shred the leftover meat for chicken salad, tacos, soup, or pasta. It’s already seasoned and cooked, so it just needs to be added to whatever else you’re making. Leftover roasted chicken tastes way better than bland rotisserie chicken from the grocery store. The herbs and seasonings make it work in just about any recipe that calls for cooked chicken.
After picking all the meat off, save the carcass for making stock. Just put the bones in a big pot, cover with water, and simmer for several hours. That’s it. No need to get complicated with it. The resulting stock has so much more taste than anything from a box or can. Use it for soup, risotto, or cooking rice. Even the vegetables that were stuffed inside the chicken can go into the stock pot. Nothing goes to waste, and everything gets used. A single chicken ends up providing multiple meals when you use it smartly.
Roasting a whole chicken doesn’t have to be stressful or complicated. With these straightforward techniques, anyone can make a restaurant-quality meal at home. The herb butter under the skin, the two-temperature roasting method, and proper resting time are the secrets that make all the difference. Once you’ve made it this way a few times, it becomes second nature. Pretty soon you’ll be the person everyone asks for roasted chicken tips.
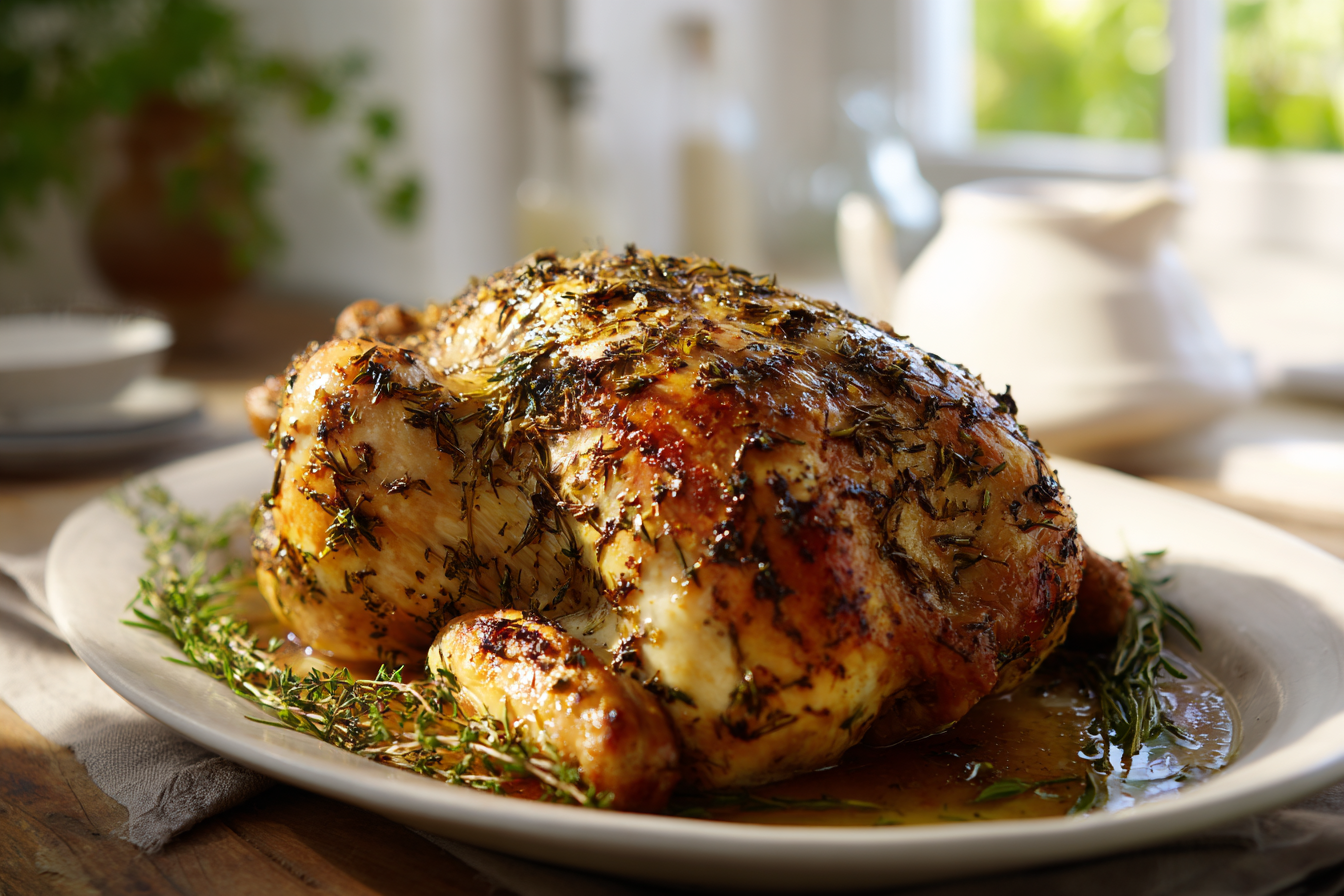
Herb-Crusted Roast Chicken
Cuisine: American4
servings15
minutes1
hour30
minutes516
kcalThis foolproof roasted chicken with herb butter under the skin delivers crispy golden skin and incredibly moist, well-seasoned meat every single time.
Ingredients
1 whole chicken (4-5 pounds), any size
3 tablespoons unsalted butter, softened to room temperature
1 tablespoon fresh chopped herbs (thyme, rosemary, and/or sage)
1 teaspoon kosher salt, plus more for seasoning
Freshly cracked black pepper to taste
Aromatic vegetables for stuffing (onion, garlic, celery, carrot, lemon)
1-2 tablespoons olive oil
Fresh herb sprigs (thyme, rosemary, sage) for cavity
Kitchen twine for tying legs
Directions
- Remove the chicken from the refrigerator and let it sit at room temperature for 30 minutes before cooking. Preheat your oven to 350°F and position a rack in the middle of the oven. Remove any giblets from the cavity and pat the entire chicken completely dry with paper towels, inside and out.
- Make the herb butter by mixing the softened butter with about three-quarters of the chopped herbs, 1 teaspoon salt, and freshly cracked black pepper in a small bowl. Mix until the herbs are evenly distributed throughout the butter. Reserve the remaining chopped herbs for later use on the outside of the chicken.
- Season the inside cavity of the chicken generously with salt and pepper. Stuff the cavity with aromatic vegetables and fresh herb sprigs, packing in as much as will fit comfortably. This adds moisture and subtle seasoning to the chicken as it roasts from the inside.
- Carefully slide your fingers under the breast skin to separate it from the meat, starting at the neck end and working toward the legs. Be gentle to avoid tearing the skin. Use a spoon to place half the herb butter under the skin on one side of the breast, then massage it from the outside to spread evenly. Repeat with the other side using the remaining herb butter.
- Cross the chicken legs and tie them together with kitchen twine using a simple knot. This keeps the legs close to the body so they don’t dry out during roasting. Drizzle olive oil all over the chicken, then rub it into every surface with your hands to ensure complete coverage.
- Sprinkle the outside of the chicken lightly with salt, pepper, and the reserved chopped herbs. Go easy on the salt since the herb butter under the skin and cavity seasoning already provide plenty. Place the chicken on a roasting rack or in a cast iron pan breast side up.
- Insert a meat thermometer probe into the thickest part of the breast, angling toward the center and avoiding the bone. Roast at 350°F until the thermometer reads 140°F, which typically takes about 60-75 minutes depending on the size of your chicken. When it reaches 140°F, increase the oven temperature to 400°F.
- Continue roasting at 400°F until the internal temperature reaches 160°F, about 15-20 more minutes. Remove the chicken from the oven immediately and let it rest for at least 15-20 minutes before carving. The temperature will rise to 165°F during resting. Carve the chicken and serve with the pan drippings poured over the top.
Notes
- Dried herbs can substitute for fresh, but use about half the amount since they’re more concentrated in taste.
- If you don’t have all the vegetables listed for stuffing, just use whatever you have on hand like onion pieces, garlic cloves, or lemon halves.
- Letting the chicken sit at room temperature before roasting ensures more even cooking throughout.
- Thoroughly drying the chicken with paper towels before seasoning is essential for achieving crispy, golden brown skin.
- Never rely on plastic pop-up indicators that sometimes come with chickens as they result in overcooked, dry meat.
- The chicken can rest for up to 30 minutes and will still be hot enough to serve.
- Save the leftover carcass to make homemade chicken stock by simmering it in water for several hours.
Frequently asked questions
Q: Can I roast the chicken without a rack?
A: Absolutely. Use a cast iron skillet or baking pan instead. You can even layer vegetables like potatoes or carrots on the bottom to act as a makeshift rack and prevent the skin from sticking to the pan.
Q: Does this method work for turkey?
A: Yes, the same technique works great for turkey. The only difference is the longer cooking time required for a larger bird. Skip the temperature increase at the end since the skin will brown naturally during the extended roasting time.
Q: Should I cover the chicken with foil while it roasts?
A: No, covering the chicken prevents the skin from browning and crisping up properly. Leave it uncovered for the entire roasting time to get that golden, crispy exterior.
Q: How long does leftover roasted chicken last in the refrigerator?
A: Properly stored leftover chicken stays good in the refrigerator for 3-4 days. Store it in an airtight container and use it for sandwiches, salads, soups, or any recipe calling for cooked chicken.