
Most home cooks panic when it comes to making gravy from scratch. The truth is, you only need four basic ingredients and about five minutes to create restaurant-quality gravy that will make your family forget about those packets and jars forever. This foolproof method uses a simple ratio that works every single time, whether you’re making a quick weeknight dinner or preparing for the holidays.
Using the wrong fat-to-flour ratio ruins everything
The biggest mistake people make is eyeballing the measurements instead of following a proven ratio. Too much flour creates a thick, pasty mess that tastes like wallpaper paste. Too little flour leaves you with flavored water that runs right off your mashed potatoes. The magic numbers are simple: equal parts fat and flour, then gradually add your liquid.
Professional chefs use a 1:1:8 ratio as their foundation – one part fat, one part flour, and eight parts liquid. This creates a smooth, pourable consistency that coats food perfectly. Many recipes suggest 1.5 tablespoons of fat and flour to each cup of liquid, which gives you exactly one cup of finished gravy. Write this ratio on a sticky note and keep it in your kitchen drawer.
Adding liquid too fast creates lumpy disasters
Picture this: you’ve got your butter melted, flour whisked in, and you dump all two cups of broth in at once. What happens next looks like chunky cottage cheese floating in brown water. The flour clumps up instantly when it hits that much liquid, and no amount of frantic whisking will fix it. This is why gravy has such a bad reputation among home cooks.
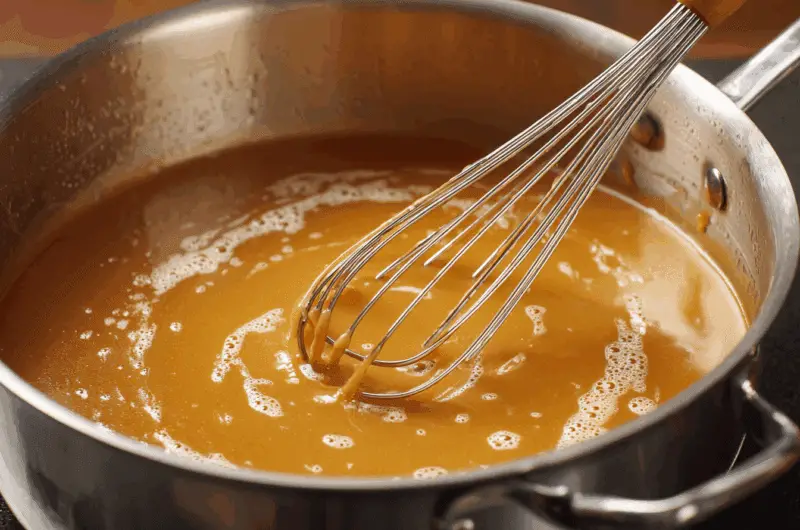
The secret is patience and gradual addition. Start with just a few tablespoons of liquid and whisk until completely smooth. Add a little more, whisk again, then gradually stream in the rest while whisking constantly. This technique prevents lumps from forming and creates that silky texture you want. If you do end up with a few lumps, strain the finished gravy through a fine-mesh sieve.
Skipping the roux cooking step leaves flour taste
Raw flour tastes exactly like it sounds – raw and unpleasant. Many home cooks mix their fat and flour together, then immediately start adding liquid. This shortcut leaves you with gravy that has an underlying flour taste that no amount of seasoning can cover up. The flour needs time to cook and develop its thickening power.
After whisking your fat and flour together, let the mixture bubble and cook for about two minutes over medium heat. This cooking process eliminates the raw flour taste and creates what chefs call a roux. The mixture should smell nutty and look slightly golden. Some cooks prefer to skip this step, but taking those extra two minutes makes the difference between okay gravy and incredible gravy that people remember.
Using only broth makes bland, one-dimensional gravy
Plain chicken or beef broth from a carton creates serviceable gravy, but it lacks the depth that makes people go back for seconds. The liquid component is where you can really boost the taste without adding extra work. Think of it as your secret weapon for creating gravy that tastes like you spent hours making it.
Try replacing half your broth with dry white wine, or add a splash of Worcestershire sauce for umami depth. Mushroom broth instead of chicken broth creates an earthier taste that pairs beautifully with beef or pork. Even adding a tablespoon of butter at the end creates richness that makes store-bought versions taste flat in comparison. The liquid is your canvas for creating signature gravy that becomes a family favorite.
Forgetting to taste and season ruins perfect texture
You’ve nailed the consistency, avoided lumps, and your gravy looks restaurant-perfect. Then you pour it over your food and realize it tastes like brown water. Seasoning transforms good gravy into great gravy, but it needs to happen at the right time and in the right amounts. Salt, pepper, and herbs should be added after the gravy thickens, not before.
Start with small amounts of salt and pepper, then taste and adjust. Remember that gravy will taste stronger when it’s hot than when it cools down on your plate. Fresh herbs like thyme or rosemary add sophistication, while garlic powder or onion powder create comfort-food appeal. The key is adding seasonings gradually and tasting after each addition until you hit that perfect balance.
Wrong heat level burns the roux or creates weak gravy
High heat might seem like a time-saver, but it’s actually gravy’s worst enemy. Too much heat burns the flour in your roux, creating bitter, dark specks that ruin the whole batch. On the flip side, too little heat means your gravy never thickens properly, leaving you with thin, watery results that disappoint everyone at the table.
Medium heat is the sweet spot for every stage of gravy making. It’s hot enough to cook the flour and create proper thickening, but gentle enough to prevent burning. Professional techniques emphasize maintaining consistent medium heat throughout the entire process. If your gravy seems too thick, add more liquid rather than reducing the heat. If it’s too thin, let it simmer longer to reduce and concentrate.
Not using pan drippings wastes the best part
Those brown, caramelized bits stuck to your roasting pan after cooking meat are liquid gold for gravy making. Many home cooks rinse them down the drain or ignore them completely, then wonder why their gravy tastes bland compared to restaurant versions. Pan drippings contain concentrated meat juices and caramelized proteins that add incredible depth to your gravy.
Scrape up those browned bits with a spatula and add them directly to your gravy. If there’s a lot of fat, use a gravy separator to remove excess grease while keeping the flavorful juices. Even a small amount of pan drippings mixed with regular broth creates gravy that tastes like it came from a high-end steakhouse. Don’t let this free boost go to waste.
Making gravy at the last minute creates kitchen chaos
Nothing creates dinner stress like trying to make gravy while your family waits with plates full of food getting cold. Last-minute gravy making usually leads to rushed measurements, skipped steps, and disappointing results. The good news is that gravy actually improves when made ahead and reheated, so there’s no reason to torture yourself with timing pressure.
Make your gravy earlier in the day and reheat it gently on the stove, whisking to restore smoothness. Proper storage keeps gravy fresh in the refrigerator for up to four days or frozen for several months. This advance preparation lets you focus on other dishes during the final dinner rush and ensures your gravy gets the attention it deserves for perfect results.
Using the wrong pan size affects cooking control
A huge stockpot might seem practical for making gravy, but it actually makes the process much harder. Large pans distribute heat unevenly and make it difficult to control the cooking process. The wide surface area causes liquid to evaporate too quickly, and whisking becomes awkward in an oversized pan. Your gravy needs a cozy environment to come together properly.
A medium-sized saucepan works perfectly for most gravy quantities. It provides even heat distribution, makes whisking comfortable, and gives you better control over the consistency. The pan should be large enough to whisk without splashing, but not so large that your ingredients spread out too thin. This simple equipment choice makes the difference between struggling with your gravy and having it come together effortlessly.
Perfect gravy isn’t magic – it’s just understanding a few basic principles and avoiding common mistakes. Once you master the simple ratio and technique, you’ll never need to buy jarred gravy again. Your family will start requesting your homemade version, and you’ll have the confidence to make it any night of the week without stress or guesswork.
5-Minute Perfect Gravy
Cuisine: American4
servings2
minutes8
minutes75
kcalThis foolproof gravy recipe uses a simple 4-ingredient method that creates silky, restaurant-quality results every single time.
Ingredients
1/4 cup unsalted butter
1/4 cup all-purpose flour
2 cups chicken broth or beef broth
Salt and black pepper to taste
Optional: 1 tablespoon pan drippings
Optional: 1 teaspoon Worcestershire sauce
Optional: 1/4 teaspoon garlic powder
Optional: Fresh thyme or rosemary
Optional: 2 tablespoons dry white wine
Directions
- Melt the butter in a medium saucepan over medium heat. Allow it to bubble gently but don’t let it brown or burn. The butter should be completely melted and hot before proceeding to the next step.
- Add the flour to the melted butter and whisk immediately to combine. Continue whisking for about 2 minutes until the mixture bubbles and smells nutty. This cooking step eliminates the raw flour taste and creates a proper roux foundation.
- Gradually add the broth, starting with just 2-3 tablespoons while whisking constantly. Once smooth, add another 1/4 cup and whisk until combined. Continue adding the remaining broth in a slow, steady stream while whisking continuously to prevent lumps.
- Increase heat to medium-high and bring the mixture to a gentle boil while stirring frequently. The gravy will begin to thicken as it heats up. Once boiling, reduce heat to low and simmer for 2-3 minutes until it reaches your desired consistency.
- Remove from heat and taste the gravy. Season with salt and pepper, starting with small amounts and adjusting to taste. Add any optional ingredients like pan drippings, Worcestershire sauce, or herbs at this point.
- If the gravy is too thick, whisk in additional broth one tablespoon at a time until desired consistency is reached. If too thin, return to low heat and simmer for a few more minutes to reduce and thicken.
- For perfectly smooth gravy, strain through a fine-mesh sieve into your serving container. This step removes any small lumps or bits that might have formed during cooking. Press the solids with a spoon to extract maximum liquid.
- Serve immediately while hot, or keep warm in a low oven or slow cooker until ready to serve. Leftover gravy can be stored in the refrigerator for up to 4 days and reheated gently on the stovetop with a splash of broth if needed.
Notes
- For richer gravy, substitute pan drippings for half the butter – just make sure to remove excess fat first
- This recipe doubles easily for larger crowds – just maintain the 1:1:8 ratio of fat to flour to liquid
- Gravy can be made up to 3 days ahead and reheated gently on the stovetop, whisking to restore smoothness
- For gluten-free gravy, substitute cornstarch for flour using half the amount and mix with cold broth before adding
- If gravy becomes lumpy, strain through a fine-mesh sieve or use an immersion blender to smooth it out
Frequently Asked Questions
Q: Can I make gravy without butter or animal fat?
A: Yes! You can use olive oil, vegetable oil, or even vegan butter as your fat base. The key is maintaining the same 1:1 ratio of fat to flour. Plant-based oils work just as well for creating the roux and will give you smooth, lump-free gravy.
Q: How do I fix gravy that’s too salty?
A: Add more unsalted broth or water to dilute the saltiness, then thicken again if needed by simmering longer. You can also add a peeled potato to absorb some salt – let it cook for 10 minutes, then remove it. Adding a splash of cream or milk can also help balance overly salty gravy.
Q: Why does my gravy get thick and gelatinous when it cools?
A: This is completely normal! Flour-based gravies thicken as they cool due to the starch structure. Simply reheat gently on the stovetop and whisk in a little extra broth or water to restore the proper consistency. The gravy will return to its smooth, pourable texture.
Q: Can I freeze homemade gravy for later use?
A: Absolutely! Gravy freezes well for up to 3 months in freezer-safe containers. Thaw completely in the refrigerator overnight, then reheat on the stovetop over low heat, whisking frequently. You may need to add a splash of broth to restore the original consistency after freezing.