
When the weather gets cooler and weeknight dinners need to happen fast, throwing together something that tastes amazing without creating a mountain of dishes sounds pretty perfect. That’s exactly what this one pan chili mac delivers. It’s basically everything good about chili and mac and cheese combined into one skillet meal that’s ready in under 30 minutes. The best part? Kids actually eat it without complaining, and adults genuinely enjoy it too. This isn’t fancy food, but it’s the kind of meal that makes everyone happy after a long day.
Everything cooks together in one skillet
The whole point of this recipe is simplicity. You start by browning ground beef with chopped onion in a large skillet, then add your seasonings right to the meat. Once the beef is cooked through, you drain any excess grease and toss in minced garlic. Then comes the good stuff: canned diced tomatoes, chili beans, tomato sauce, beef broth, and uncooked elbow macaroni all go straight into the same pan. No boiling pasta separately or dirtying extra pots.
The pasta cooks right in the sauce, which means it soaks up all those spices and tomato flavors as it softens. You’ll want to bring everything to a quick boil, then cover the skillet and turn the heat down to low. Give it about 12 minutes, stirring once or twice so nothing sticks to the bottom. When the noodles are tender and the sauce has thickened up nicely, you stir in shredded cheddar cheese until it melts into the whole thing. It’s ready to eat right from the skillet, no fancy plating required.
The spice blend makes all the difference
Instead of reaching for a packet of chili seasoning, making your own spice mix takes just an extra minute and tastes way better. You’ll combine chili powder, ground cumin, paprika, onion powder, salt, and pepper. Some recipes also add a touch of cayenne pepper if you want a little kick, but that’s totally optional depending on who’s eating. The paprika adds a subtle smokiness that makes the whole dish taste richer without being overwhelming.
These everyday spices probably already live in your cabinet, so there’s no need to hunt down anything unusual. When you cook the spices with the beef and onions, they bloom in the heat and coat everything with that warm chili flavor. If you’re really pressed for time, a store-bought chili seasoning packet works fine as a substitute. Just keep in mind that packaged mixes can vary in saltiness and spice level, so you might need to adjust the seasoning at the end to get it just right for your family’s taste.
Choosing the right pan matters more than you think
A large 12-inch skillet with a lid is really the best tool for this job. You need enough space for a pound of ground beef, all those liquids, and two cups of dry pasta to cook without overflowing. If your skillet is too small, the noodles won’t cook evenly and you’ll end up with some mushy pieces and some crunchy ones. A deep skillet or even a Dutch oven works great because the high sides prevent any splattering when things start to bubble.
The lid is important too since it traps steam and helps the pasta cook through properly. Without a lid, too much liquid evaporates and the noodles won’t soften right. If your skillet doesn’t have a lid, you can use aluminum foil in a pinch, but make sure it’s sealed around the edges. Cast iron skillets work perfectly for this recipe because they hold heat well and create a nice even simmer. Just remember that the pan will be heavy when it’s full, so make sure you’ve got a good grip when you’re stirring.
Ground beef options and how to handle them
Most people use regular ground beef for this recipe, but the fat content makes a difference. If you go with 80/20 ground beef (that’s 80% lean, 20% fat), you’ll definitely need to drain the grease after browning it. That extra fat adds flavor but can make the dish greasy if you leave it all in. On the other hand, 90/10 or 93/7 lean ground beef means less draining but also slightly less rich flavor.
Ground turkey is a solid substitute if you don’t eat beef or just prefer poultry. It’s leaner and has a milder taste, so you might want to add an extra pinch of salt or a bit more chili powder to compensate. Some folks even use ground chicken or pork with good results. The cooking process stays exactly the same no matter which meat you choose. Just make sure whatever protein you use is fully cooked and browned before you add the rest of the ingredients, so everything cooks evenly and safely.
Why canned ingredients actually work better here
Fresh tomatoes sound nice in theory, but canned diced tomatoes and tomato sauce are honestly better for this recipe. They’re consistent, already seasoned with a bit of salt, and they break down into the sauce perfectly. A 14.5-ounce can of diced tomatoes plus an 8-ounce can of tomato sauce gives you the right balance of chunks and smooth sauce. Don’t drain the diced tomatoes because that liquid helps cook the pasta.
Chili beans are another canned hero here. A 15.5-ounce can adds protein, fiber, and that classic chili texture without any extra work. You don’t need to drain or rinse them either since the liquid they’re packed in adds flavor and body to the sauce. Some brands pack their chili beans in a lightly spiced sauce, which just makes everything taste better. If you can’t find chili beans, regular kidney beans work fine, though you might want to add a tiny bit more seasoning to make up for the missing spice.
Getting the pasta texture just right
The trickiest part of this whole recipe is cooking the pasta properly. Since the elbow macaroni cooks directly in the sauce, timing matters. You want to turn off the heat when the noodles are just barely tender, still with a tiny bit of firmness in the center. They’ll keep cooking from the residual heat in the pan, especially once you add the cheese and put the lid back on. If you cook them until they’re completely soft, they’ll turn mushy by the time you serve.
Stirring once or twice during those 12 minutes of covered cooking prevents the noodles on the bottom from sticking and burning. You don’t need to stir constantly, just a quick scrape of the bottom every 4-5 minutes does the trick. If the sauce looks too thick and the pasta seems dry before it’s cooked through, add a splash more beef broth or even water. On the flip side, if there’s still a lot of liquid when the noodles are done, let it simmer uncovered for a minute or two to thicken up before adding the cheese.
Cheese choices that melt into the sauce
Sharp cheddar is the classic choice because it melts smoothly and adds a nice tangy punch to balance out the tomatoes and spices. You’ll need about two cups of shredded cheese total. Stir half of it into the hot pasta mixture until it melts completely and makes the sauce creamy. Then sprinkle the other half on top, cover the pan, and let the heat melt it into a gooey layer. This two-step cheese addition gives you both a creamy sauce and that satisfying melted cheese look on top.
Colby Jack, Monterey Jack, or even a Mexican cheese blend work great if that’s what you’ve got. Pre-shredded cheese from a bag is convenient and melts fine, though it sometimes has anti-caking powder that can make the sauce slightly grainy. Shredding a block of cheese yourself takes an extra couple minutes but melts smoother. Whatever cheese you use, medium or sharp varieties have more flavor than mild, which helps the cheese stand out against all those bold chili spices.
What to serve alongside this meal
This chili mac is pretty filling on its own, but a few simple sides round out the meal nicely. Buttered bread or cornbread is perfect for soaking up any extra sauce. Some people like to put out a bag of tortilla chips for scooping right from the serving bowl. A basic green salad with ranch dressing or a simple vinaigrette adds a fresh crunch that contrasts with the rich, cheesy pasta.
Roasted vegetables like green beans, broccoli, or zucchini work well if you want to add more veggies to the plate. They’re easy to throw in the oven while the chili mac cooks on the stove. You could also set out some optional toppings for people to customize their bowls: sour cream, sliced green onions, chopped fresh cilantro, diced avocado, or pickled jalapeños. Kids especially like being able to add their own toppings, and it makes the meal feel a bit more special without any extra cooking effort.
Storing leftovers and reheating tips
This recipe makes a generous amount, so leftovers are pretty much guaranteed. Let the chili mac cool down, then transfer it to airtight containers and stick them in the fridge. It’ll stay good for about 3-4 days. The pasta will keep absorbing liquid as it sits, so leftovers might look a bit drier than when you first made it. That’s totally normal and doesn’t mean anything’s wrong with it.
Reheating in the microwave works best. Put a portion in a microwave-safe bowl, add a splash of water or beef broth to loosen it up, and heat it in 30-second intervals, stirring between each one. You can also reheat it on the stovetop in a pan over medium-low heat with a bit of extra liquid. This chili mac freezes well too. Pack cooled portions into freezer-safe containers, label them with the date, and freeze for up to 3 months. Thaw overnight in the fridge before reheating.
Making this one pan chili mac solves the weeknight dinner problem without requiring fancy ingredients or complicated steps. It’s the kind of recipe you’ll make over and over because it’s reliable, satisfying, and everyone actually eats it. Once you’ve got the basic method down, feel free to tweak the spices, swap in different beans, or add vegetables like bell peppers or corn. The one-pan approach means cleanup takes just a few minutes, leaving you more time to relax after dinner instead of scrubbing pots.
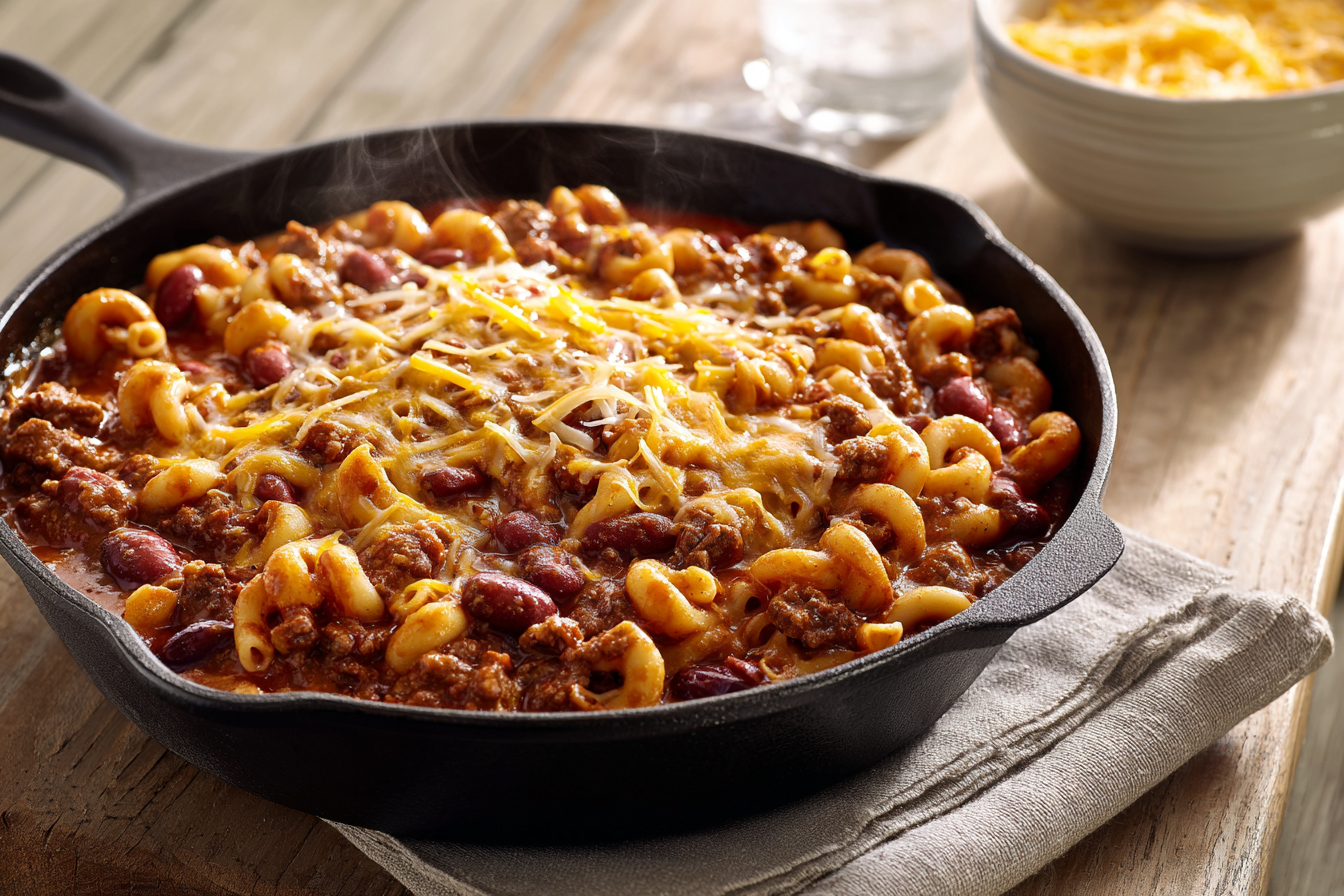
One Pan Chili Mac
Cuisine: American6
servings10
minutes20
minutes450
kcalQuick and easy one skillet meal combining chili and mac and cheese that’s ready in under 30 minutes.
Ingredients
1 lb ground beef
1 chopped onion
1/2 tsp each of salt, pepper, ground cumin
1 tsp each of onion powder and paprika
2 tsp chili powder
1 tbsp minced garlic
14.5 oz can diced tomatoes (not drained)
15.5 oz can chili beans (not drained)
8 oz can tomato sauce
1 1/2 cups beef broth
2 cups elbow noodles (uncooked)
2 cups shredded cheddar cheese
Directions
- Heat a large 12-inch skillet over medium-high heat. Add the ground beef and chopped onion to the pan. Break up the beef with a wooden spoon as it cooks, stirring occasionally until the meat is fully browned and the onion is softened, about 6-8 minutes.
- Season the cooked beef with salt, pepper, ground cumin, onion powder, paprika, and chili powder, stirring well to coat everything evenly. If you used higher-fat ground beef, drain any excess grease from the skillet at this point. Add the minced garlic and stir for about 30 seconds until fragrant.
- Pour the diced tomatoes with their juices, chili beans with their liquid, tomato sauce, and beef broth into the skillet. Stir everything together until well combined, making sure to scrape up any browned bits from the bottom of the pan. These bits add extra flavor to the sauce.
- Add the uncooked elbow noodles to the skillet and stir them into the sauce. Bring the mixture to a quick boil over medium-high heat, then immediately reduce the heat to low. Cover the skillet with a lid.
- Let the mixture simmer covered for about 12 minutes, stirring once or twice during cooking to prevent the noodles from sticking to the bottom. The pasta should be tender and the sauce should have thickened nicely. If it looks too dry, add a splash more broth.
- Turn off the heat. Stir in 1 cup of the shredded cheddar cheese until it’s completely melted and incorporated into the sauce, creating a creamy texture. The residual heat from the pan will melt the cheese perfectly.
- Sprinkle the remaining 1 cup of shredded cheese evenly over the top of the chili mac. Place the lid back on the skillet and let it sit for 2-3 minutes, allowing the cheese on top to melt into a gooey layer.
- Serve the chili mac hot, straight from the skillet or transfer to individual bowls. Garnish with optional toppings like sour cream, sliced green onions, or fresh cilantro if desired. Enjoy with buttered bread or cornbread on the side.
Notes
- Use 85% or 90% lean ground beef to reduce the amount of grease you’ll need to drain. Higher fat content adds flavor but requires draining.
- Ground turkey, chicken, or pork can be substituted for beef. You may need to add slightly more seasoning with leaner meats.
- A large 12-inch skillet or Dutch oven with a lid works best to ensure everything cooks evenly without overflowing.
- Turn off the heat when pasta is just tender, not completely soft, as it will continue cooking from residual heat.
- Leftovers can be stored in the refrigerator for 3-4 days or frozen for up to 3 months. Add a splash of broth when reheating.
- Colby Jack or Monterey Jack cheese can be used instead of cheddar for a different flavor profile.
- For extra spice, add diced green chiles, jalapeños, or a pinch of cayenne pepper to the beef mixture.
Frequently asked questions
Q: Can I use a different type of pasta instead of elbow macaroni?
A: Yes, small pasta shapes like shells, rotini, or penne work fine. Just keep the cooking time similar and make sure the pasta is small enough to cook through in about 12 minutes. Larger pasta shapes might need a few extra minutes and possibly more liquid.
Q: What if I don’t have beef broth on hand?
A: Chicken broth works just as well, or you can use water with a beef bouillon cube dissolved in it. The broth adds more depth of flavor, but in a pinch, even plain water will work since the tomatoes and spices provide plenty of taste.
Q: How can I make this chili mac spicier?
A: Add diced jalapeños or green chiles when you brown the beef, increase the chili powder to 1 tablespoon, or stir in some hot sauce or cayenne pepper at the end. You can also top individual servings with sliced jalapeños so people can adjust their own heat level.
Q: Why did my pasta turn out mushy?
A: The pasta probably cooked too long. Turn off the heat as soon as the noodles are just tender with a slight firmness in the center. They’ll continue softening from the residual heat, especially once you add the cheese and cover the pan. Next time, check the pasta a minute or two earlier.