
Most people think you need a fancy smoker or grill to make amazing ribs at home. That’s just not true. Your regular oven can turn out ribs that are so tender the meat slides right off the bone with barely any effort. The trick is baking them low and slow, wrapped tightly in foil, then finishing them with a sweet and smoky sauce under the broiler. This method has been tested by thousands of home cooks who keep coming back to it because it works every single time, no special equipment required.
Baby back ribs work best for this recipe
Baby back ribs are smaller and more tender than spare ribs, which makes them perfect for oven cooking. You’ll find them at pretty much any grocery store in the meat section, usually sold in racks that weigh around two to two and a half pounds. These ribs come from the back of the pig near the loin, so they have less fat and cook faster than other types. Most butchers will have already removed the tough membrane from the back, but you should always check before you start cooking.
If that thin silvery membrane is still there, you need to peel it off before seasoning. Just slide a butter knife under one corner to loosen it, then grab it with a paper towel and pull it away from the bones in one piece. This step really matters because that membrane gets chewy and tough when cooked, and it also blocks your seasoning from getting into the meat. The whole process takes maybe two minutes but makes a huge difference in how tender your finished ribs turn out.
Simple seasonings create the best base
You don’t need a complicated spice rub with fifteen different ingredients to make great ribs. A basic mix of brown sugar, paprika, black pepper, salt, garlic powder, onion powder, cumin, chili powder, and a tiny bit of dry mustard creates an incredible crust. The brown sugar helps with caramelization and adds sweetness that balances out the smoky spices. Mix all these together in a small bowl before you start cooking so you can coat both sides of the ribs evenly.
Pat the dry rub all over the ribs with your hands, making sure to get it into all the nooks between the bones. Some people like to let the seasoned ribs sit in the fridge for a few hours or overnight, but honestly it’s not necessary if you’re short on time. The long cooking process gives the spices plenty of time to work their way into the meat. Once they’re seasoned, wrap the ribs tightly in heavy duty aluminum foil and place them on a large baking sheet before sliding them into a preheated oven set to 275 degrees.
Low and slow is the secret to tender meat
Cooking ribs at 275 degrees for three hours might seem like forever, but that low temperature is what breaks down all the tough connective tissue and fat without drying out the meat. High heat would cook them faster but leave you with chewy, tough ribs that nobody wants to eat. During those three hours, the foil traps all the steam and moisture around the ribs, basically steaming them in their own juices while the dry rub forms a flavorful crust underneath.
You can check if they’re done by carefully opening the foil and poking the meat with a fork or knife. If it slides in easily with almost no resistance, they’re ready. The meat should have pulled back from the ends of the bones by at least a quarter inch, exposing the bone tips. Some ovens run a little cooler than others, so if your ribs aren’t quite tender enough at the three hour mark, just wrap them back up and give them another thirty minutes. Better to cook them a bit longer than to pull them out too early and end up with tough meat that won’t come off the bone.
Making your own BBQ sauce is easier than you think
Sure, you can use store bought sauce if that’s what you have on hand, but whipping up a quick homemade version takes maybe ten minutes and tastes so much better. Start by cooking some finely diced onion in a tablespoon of olive oil until it gets soft and translucent, which takes about five to eight minutes. Then add ground cumin and let it toast for thirty seconds to wake up those flavors before stirring in ketchup, hot chili sauce like Sriracha, brown sugar, and apple cider vinegar.
Let everything simmer together for a couple minutes while you stir it, then season with salt to taste. The ketchup gives you that classic BBQ base, the brown sugar adds sweetness, the vinegar cuts through the richness with some tang, and the hot sauce brings just enough heat to keep things interesting. You can adjust the spice level by adding more or less hot sauce depending on who you’re feeding. This sauce keeps in the fridge for about a week, so you can make it ahead of time or save any leftovers for chicken wings or burgers later in the week.
Broiling at the end caramelizes everything perfectly
After all that slow cooking, the ribs come out of the oven tender and juicy but without that sticky, caramelized coating you want. That’s where the broiler comes in. Carefully unwrap the foil and brush both sides of the ribs generously with your BBQ sauce, then move an oven rack near the top and crank your broiler to high. The intense direct heat from the broiler caramelizes the sugars in the sauce and creates that glossy, sticky finish in just three to five minutes.
Watch them closely during this step because the line between perfectly caramelized and burnt is pretty thin. You’ll see the sauce start to bubble and turn shiny as it reduces and sticks to the meat. Some people like to flip the ribs and sauce both sides under the broiler, while others just do the top. Either way works fine. Once you pull them out, let the ribs rest on a cutting board for about ten minutes before slicing between the bones into individual ribs. That resting time lets the juices redistribute so they don’t all run out when you cut into them.
Serving these with classic BBQ sides makes a complete meal
Ribs practically demand certain side dishes to complete the experience. Creamy coleslaw is the classic choice because the cool, crunchy cabbage cuts through all that rich, fatty pork. Potato salad works great too, especially the kind with a vinegar based dressing rather than super heavy mayo. Corn on the cob, whether grilled or boiled, adds some sweetness and a different texture. And don’t forget about cornbread or dinner rolls for soaking up any extra sauce on your plate.
Baked beans are another traditional pairing that most people love with ribs. Mac and cheese shows up at a lot of BBQ tables too, especially if you’re feeding kids who might not be huge rib fans yet. A simple green salad with ranch or blue cheese dressing helps balance out all the heavy, rich stuff. Really though, ribs are pretty forgiving when it comes to sides. Whatever you normally serve at cookouts or family dinners will probably work just fine. The ribs are the star of the show anyway, so keep the sides simple and let that tender, smoky meat be the main attraction on everyone’s plate.
Leftovers reheat surprisingly well in the oven
If you somehow have leftover ribs, which honestly doesn’t happen that often, they keep in the fridge for about four days in an airtight container. The best way to reheat them is wrapping them back up in foil and putting them in a 275 degree oven for twenty to thirty minutes until they’re warmed through. The microwave will work in a pinch but tends to make the meat a bit rubbery and dries it out. You can also reheat them on a grill over medium heat if you have one going.
Some people actually think ribs taste even better the next day after all those spices have had more time to penetrate the meat. You can brush them with a little extra BBQ sauce before reheating if they look dry. Leftover ribs also make great additions to other meals beyond just eating them as is. Chop up the meat and throw it into mac and cheese, pile it on nachos, stuff it into tacos, or use it as a pizza topping. The smoky, tender pork adds so much character to whatever you put it in that nobody will even realize you’re just using up leftovers from dinner two nights ago.
You can cook multiple racks at once without issues
Feeding a crowd means cooking more than one rack of ribs, but the good news is the timing stays pretty much the same. Just wrap each rack individually in its own foil packet and arrange them on large baking sheets. Most standard ovens can fit two racks side by side on one sheet, so you could potentially cook four racks at once using two sheets on different oven racks. The total cooking time doesn’t really change much even with multiple racks in there.
The only thing to watch is that ribs on different oven racks might cook slightly differently since heat distribution isn’t always perfectly even. The rack closer to the heating element might finish a bit faster. Check each one individually to make sure they’re all tender before moving on to the saucing and broiling step. When broiling multiple racks, you might need to do them in batches since they need to be close to the heating element. It adds a few extra minutes to the process but ensures every rack gets that perfect caramelized finish instead of some being overdone while others are underdone.
This method beats grilling for consistent results
Grilling ribs can be tricky because managing the temperature over several hours is tough, especially on charcoal grills where the heat fluctuates. You’re constantly adjusting vents, adding more charcoal, moving ribs around to avoid hot spots, and hoping you don’t burn them. Gas grills are easier to control but still require you to babysit them for hours. The oven method removes all that stress because your oven maintains a steady temperature without any intervention from you.
Weather doesn’t matter either when you’re cooking inside. Rain, wind, cold, extreme heat, none of it affects your ribs when they’re safely wrapped in foil inside your oven. You can make these ribs in January when there’s snow on the ground just as easily as you can in July. The consistent temperature means consistent results every single time, which is why so many people who try this method never go back to grilling their ribs. Save the grill for burgers and hot dogs where you want that charred exterior, and let your oven handle the ribs where slow, steady heat produces the best texture.
Once you nail this basic technique, you’ll find yourself making ribs way more often because they’re honestly not that much work. The oven does most of the heavy lifting while you go about your day. Whether you’re having friends over for game day or just want something special for Sunday dinner, these fall off the bone ribs deliver restaurant quality results without the restaurant prices or the hassle of outdoor cooking.
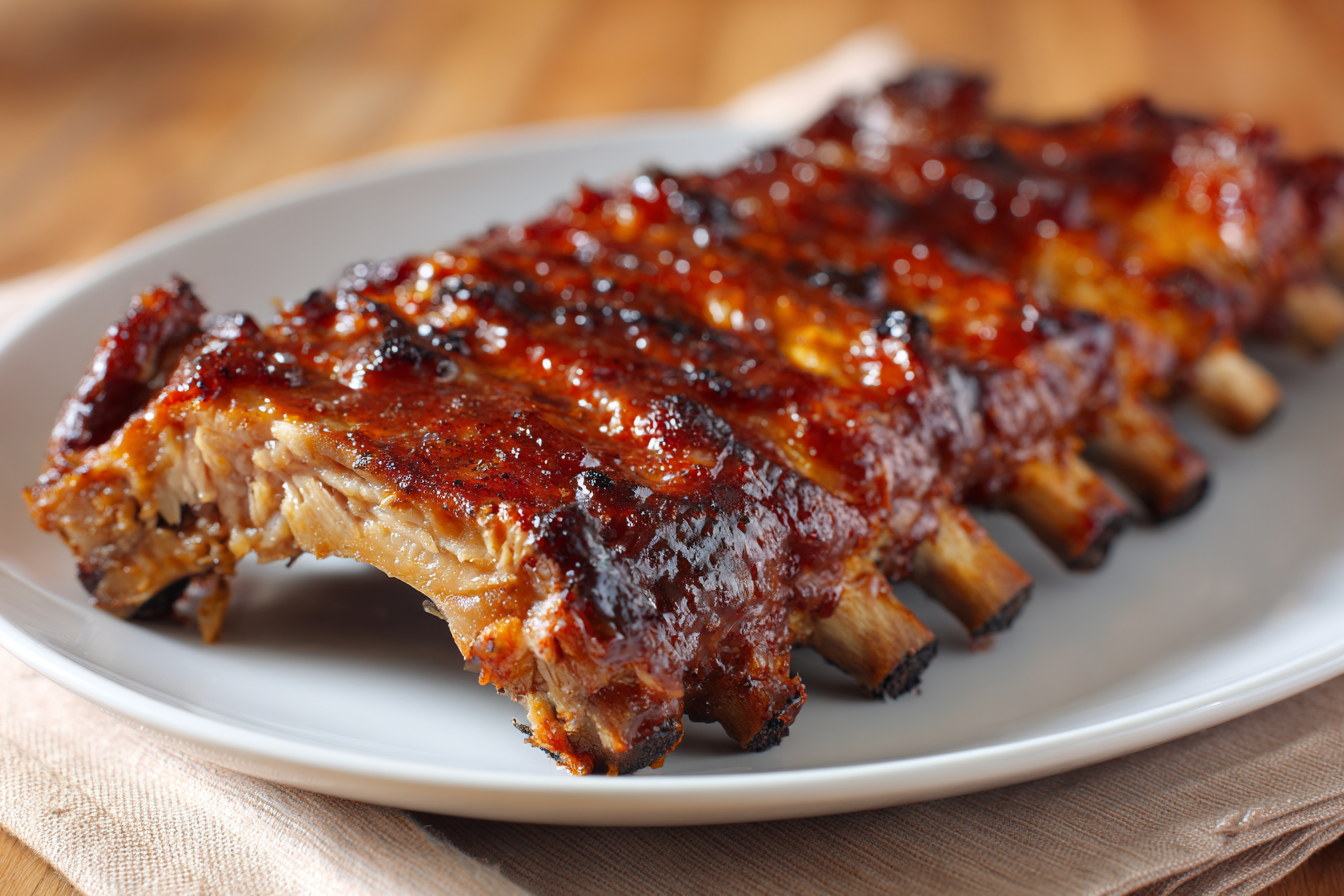
Fall Off the Bone Oven Baked Ribs
Cuisine: American4
servings10
minutes3
minutes309
kcalThese tender, juicy ribs are baked low and slow in the oven until they fall right off the bone, then finished with sweet and spicy BBQ sauce.
Ingredients
1 rack baby back ribs (about 2 to 2.5 pounds), membrane removed
3 tablespoons brown sugar
2 tablespoons paprika
1 tablespoon black pepper
2 teaspoons coarse salt
1 teaspoon garlic powder
1 teaspoon onion powder
1 teaspoon cumin
1 teaspoon chili powder
1/2 teaspoon dry mustard
1 tablespoon olive oil
1/4 cup finely diced onion
1/2 teaspoon ground cumin (for sauce)
1/2 cup ketchup
1 tablespoon hot chili sauce (like Sriracha)
2 tablespoons light brown sugar (for sauce)
1 tablespoon apple cider vinegar
Directions
- Preheat your oven to 275 degrees F. Line a large baking sheet with sides with aluminum foil for easier cleanup later. If your ribs still have the thin silvery membrane on the back, use a butter knife to gently lift one corner, then grab it with a paper towel and pull it completely off in one piece.
- Mix together the brown sugar, paprika, black pepper, salt, garlic powder, onion powder, cumin, chili powder, and dry mustard in a small bowl until well combined. Place the ribs on a large sheet of heavy duty aluminum foil and rub the spice mixture all over both sides of the ribs, pressing it into the meat with your hands.
- Wrap the ribs tightly in the aluminum foil, making sure there are no gaps or holes where steam could escape. Place the wrapped ribs on your prepared baking sheet and slide them into the preheated oven. Bake for 3 hours without opening the oven door.
- While the ribs are cooking, make your BBQ sauce. Heat the olive oil in a small saucepan over medium heat and add the diced onion. Cook, stirring occasionally, until the onion is soft and translucent, about 5 to 8 minutes. Add the cumin and cook for 30 seconds until fragrant.
- Stir in the ketchup, hot chili sauce, brown sugar, and apple cider vinegar. Bring the mixture to a simmer and cook for 2 minutes, stirring constantly. Season with salt to taste, then remove from heat and set aside until the ribs are done.
- When the ribs have cooked for 3 hours, carefully remove them from the oven and open the foil packet (watch out for hot steam). Check for doneness by poking the meat with a fork. It should slide in easily with little resistance, and the meat should have pulled back from the bone ends by about a quarter inch.
- Move an oven rack to the top position and turn your broiler to high. Unwrap the ribs completely and discard the foil and any accumulated juices. Place the ribs directly on the baking sheet, meat side up, and brush generously with your BBQ sauce on both sides.
- Place the sauced ribs under the broiler for 3 to 5 minutes, watching carefully, until the sauce starts to bubble and caramelize. Remove from the oven and let rest for 10 minutes before slicing between the bones into individual ribs. Serve with extra BBQ sauce on the side and sprinkle with fresh parsley if desired.
Notes
- If cooking spare ribs instead of baby back ribs, add an additional 30 minutes to an hour to the cooking time as they are larger and tougher.
- Leftover ribs can be stored in an airtight container in the refrigerator for up to 4 days or frozen for up to 3 months. Reheat wrapped in foil at 275 degrees F for 20 to 30 minutes.
- You can substitute your favorite store-bought BBQ sauce if you prefer not to make the homemade version.
- For less spicy ribs, reduce or omit the hot chili sauce in the BBQ sauce and cut back on the chili powder in the dry rub.
- When cooking multiple racks, wrap each individually in foil and check each one for doneness separately as cooking times may vary slightly.
Frequently asked questions about oven baked ribs
Q: Can I use spare ribs instead of baby back ribs for this recipe?
A: Yes, spare ribs will work great with this method, but they’re larger and have more connective tissue so you’ll need to add about 30 minutes to an hour to the cooking time. Check them after three hours and keep cooking until the meat is tender and pulling away from the bones.
Q: Do I really need to remove the membrane from the back of the ribs?
A: While it’s not absolutely required, removing the membrane makes a big difference in the final texture. That membrane gets really tough and chewy when cooked, and it also blocks the seasonings from penetrating the meat. It only takes a minute or two to remove and is definitely worth the small effort.
Q: Can I make these ribs ahead of time for a party?
A: Absolutely. You can cook the ribs completely, let them cool, and store them wrapped in foil in the fridge for up to two days. When you’re ready to serve, just reheat them wrapped in foil at 275 degrees for about 30 minutes, then brush with sauce and broil to caramelize.
Q: My ribs came out too tender and the meat just fell apart when I tried to slice them, what happened?
A: Your ribs were probably cooked a bit too long, which made them so tender they couldn’t hold their shape anymore. While this isn’t really a problem for eating (the meat will still taste great), next time try checking them at the 2.5 hour mark and pulling them out as soon as a fork slides in easily rather than waiting the full 3 hours.