
Springtime rolls around and suddenly those beautiful red strawberries start showing up everywhere at the grocery store. When you need a dessert that shows off those fresh berries but also want something easier than making a whole cheesecake, these strawberry cheesecake bars are exactly what you need. They have all the creamy richness you want with bright strawberry taste in every single bite, and you can make them a day ahead without any stress about last-minute baking.
The graham cracker base makes everything hold together
Most people think making a crust is complicated, but this one comes together in minutes using your food processor. The secret to getting it right is adding a little flour to the regular mix of graham crackers, butter, and sugar. That extra flour helps the crust stay crispy instead of getting soggy when the creamy layers go on top. You’ll break up about 12 whole graham cracker sheets and toss them in the food processor with the dry ingredients, then add melted butter until everything looks like wet sand.
Here’s something smart: you’re going to make extra crumb mixture and save some for the top. After mixing everything together, take out about two-thirds of a cup and set it aside in a bowl. Press the rest firmly into your lined baking pan, making sure to get into all the corners. Bake the crust for about 12 to 15 minutes until it smells amazing and starts turning golden brown around the edges. Let it cool completely before adding the cream cheese layer.
Making the cheesecake layer without stress
Traditional cheesecake recipes always tell you to bring cream cheese to room temperature and beat it forever. This method is way simpler because you’re using the food processor again. Just wash out the bowl from making the crust, toss in cold cream cheese straight from the fridge, and process it until it gets smooth and fluffy. You’ll need to stop a couple times to scrape down the sides with a spatula so everything mixes evenly, but it only takes a minute or two total.
Once the cream cheese looks light and airy, add your sugar, vanilla extract, and a pinch of salt, then process again. The last step is adding eggs one at a time while the motor runs. This foolproof food processor method means you don’t need a stand mixer or hand mixer at all. Pour the smooth cheesecake mixture over your cooled crust and spread it out evenly. The filling should reach all the way to the edges so every piece gets that creamy layer.
Getting fresh strawberries ready for baking
Raw strawberries might seem like the obvious choice, but they actually have too much moisture and will make your bars watery. The solution is cooking them briefly with a little cornstarch before adding them to the cheesecake. Dice up about 12 ounces of fresh strawberries into small pieces, then cook them in a saucepan over medium heat with two teaspoons of cornstarch. Stir them often and watch as the berries start releasing their juices and everything thickens up slightly after four or five minutes.
This quick cooking step does two important things. First, it concentrates the strawberry taste by driving off some of that extra water. Second, the cornstarch helps thicken the juices so they don’t seep into the cheesecake and make it soggy. You’ll know the berries are ready when they’ve softened and the liquid looks a bit syrupy. There might be a thin film at the bottom of your pan, which is totally normal. Let them cool for just a minute, then spoon the warm strawberries evenly over the cream cheese layer before it goes in the oven.
Baking these bars to creamy perfection
After spooning on the cooked strawberries, grab that reserved graham cracker mixture you set aside earlier and sprinkle it evenly over the top. This creates a nice crumbly topping that adds texture and looks really pretty when you cut the bars. Slide the pan into a 350-degree oven and bake for 30 to 35 minutes. You’re looking for edges that are set and puffed up, while the center should still have a slight jiggle when you gently shake the pan.
Don’t worry if the middle seems a little loose. It will firm up as it cools and then chills in the fridge. Overbaking cheesecake makes it dry and cracked, so pull it out when there’s still that tiny wobble in the center. Set the pan on a wire rack and let everything cool down completely at room temperature, which takes about two hours. Then cover the pan with plastic wrap or foil and stick it in the refrigerator for at least three hours, though overnight works even better.
Cutting clean slices that look professional
After all that work making these bars, you want them to look good when you cut them up. The trick is using a really sharp knife and running it under hot water before each cut. Seriously, this makes a huge difference. Dry the knife off with a paper towel, make your first cut, then wipe the blade clean and run it under hot water again before the next slice. It seems like extra work, but you’ll get those clean edges instead of a smeary mess.
If you lined your pan with parchment paper that hangs over the edges, you can lift the whole slab out before cutting. Just grab the excess parchment on two sides and lift straight up, then set it on a cutting board. This makes it way easier to cut neat squares. For a standard eight-by-eight-inch pan, cutting three rows in each direction gives you nine good-sized bars. If you’re serving a crowd or want smaller portions, you can easily cut them into 12 or even 16 pieces.
Why fresh strawberries beat frozen every time
You might wonder if frozen strawberries would work here since they’re available year-round and usually cheaper. The problem is that frozen berries get mushy and watery when they thaw, and they just don’t have that bright, fresh strawberry punch. Even after you cook them down, frozen berries tend to taste more muted and give off way too much liquid. The whole point of these bars is showcasing that pure strawberry season taste.
Fresh strawberries in season have the best chance of being sweet and actually tasting like strawberries. Look for berries that are deep red all the way through, not white or green near the stems. Give them a sniff at the store too. If they smell sweet and fruity, they’ll taste good. Strawberries don’t ripen after picking, so what you see is what you get. It’s worth waiting until strawberry season hits your area to make these bars instead of using sad, flavorless berries.
Make-ahead magic for busy schedules
These strawberry cheesecake bars are actually better when you make them the day before you need them. The crust softens just slightly after sitting overnight, which creates this perfect texture that’s not too hard and not too soft. The cheesecake layer gets a chance to fully set up, and all the different parts meld together into one cohesive dessert. When you make them the morning you want to serve them, they’re good but not quite as amazing.
Planning ahead also means less stress when you’re getting ready for company or a potluck. You can bake these bars, let them cool, stick them in the fridge, and forget about dessert until it’s time to eat. They’ll keep perfectly well for up to five days in the refrigerator if you store them in an airtight container. Actually, that rarely happens because people tend to eat them all within a day or two. If you need to keep them longer, these bars freeze beautifully for up to a month.
Serving these bars at room temperature or cold
Cheesecake can be served cold straight from the fridge or slightly softened at room temperature, and people have strong opinions about which is better. Cold cheesecake has a firmer texture and tastes more refreshing, especially on a warm day. Room temperature cheesecake is creamier and the different layers seem to blend together more. For these bars specifically, pulling them out about 15 minutes before serving gives you the best of both worlds.
They’ll still be cool and set but not rock-hard from the refrigerator. The graham cracker crust won’t be quite as firm, and the cheesecake layer becomes extra smooth and silky. Some folks like adding fresh sliced strawberries on top right before serving for extra flair. Toss a handful of sliced berries with a tiny bit of sugar and let them sit for five minutes to release some juice, then arrange a slice or two on each bar. It makes them look fancy without much extra work.
Doubling the recipe for bigger gatherings
An eight-by-eight-inch pan makes enough bars for a small group, but what if you’re feeding a crowd? Good news: this recipe doubles perfectly for a standard nine-by-thirteen-inch pan. Just multiply all the ingredients by two and follow the exact same steps. The baking time might need an extra five or ten minutes since there’s more volume in the pan, so keep an eye on it and look for those same signs of doneness.
A bigger pan means more pieces to cut, which is great for parties where you want smaller servings so people can try multiple desserts. You can easily get 24 small squares from a nine-by-thirteen pan. One thing to remember is that your food processor needs to be big enough to handle the doubled amounts. If your processor is on the smaller side, you might need to make the crust mixture and cheesecake filling in two batches, which only adds a few extra minutes.
Making dessert for a gathering doesn’t need to involve hours in the kitchen or complicated techniques. These strawberry cheesecake bars come together with straightforward steps that anyone can handle, even if baking isn’t usually your thing. The combination of that crispy graham cracker crust, smooth cream cheese filling, and bright strawberry layer creates something that tastes way more impressive than the effort required. Next time strawberry season comes around and you need something sweet to share, these bars should be at the top of your list.
Strawberry Cheesecake Bars with Creamy Layers
Cuisine: American12
servings20
minutes45
minutes347
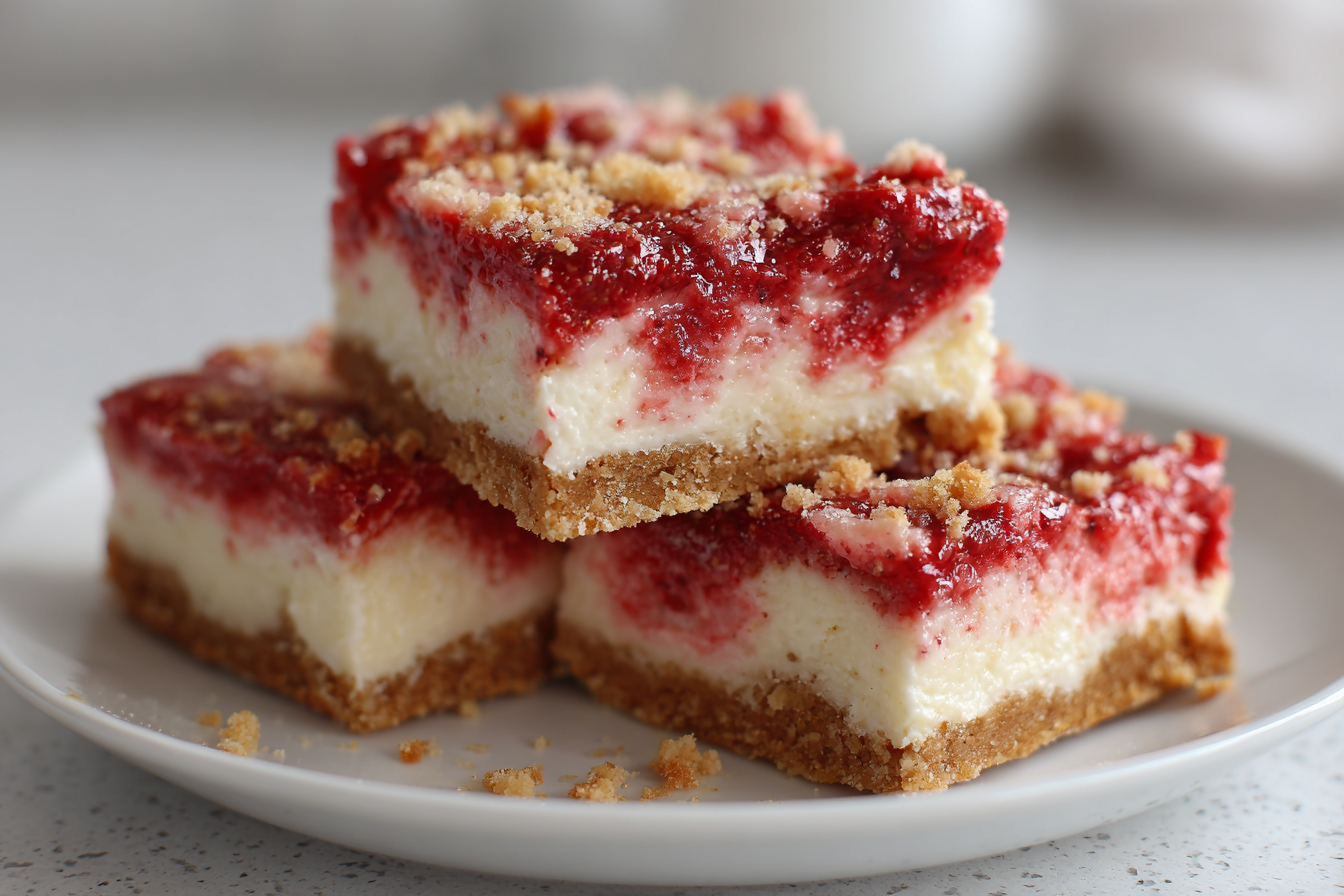
kcalThese incredible strawberry cheesecake bars feature a buttery graham cracker crust, rich cream cheese filling, and fresh cooked strawberries topped with a sweet crumble.
Ingredients
12 full-size graham crackers (about 6 1/2 ounces)
1/4 cup all-purpose flour
1/4 cup granulated sugar
1/4 teaspoon kosher salt
8 tablespoons (1 stick) unsalted butter, melted and cooled
16 ounces cream cheese, cold
1/2 cup granulated sugar
1 tablespoon vanilla extract
1/4 teaspoon kosher salt
2 large eggs
12 ounces fresh strawberries, small diced (about 2 cups)
2 teaspoons cornstarch
Directions
- Heat your oven to 350°F and line an 8×8-inch square metal baking pan with two sheets of parchment paper positioned perpendicular to each other. Make sure the parchment hangs over all four sides by at least 1 inch to create a sling for easy removal. This will make cutting and serving the bars much simpler later.
- Break the graham crackers into rough pieces and place them in your food processor along with the flour, 1/4 cup sugar, and 1/4 teaspoon salt. Process everything together until the crackers break down into a texture that looks like sand, which should take about 15 seconds. Add the melted butter and pulse 8 to 10 times with 1-second pulses until the mixture is evenly moistened and starting to clump together when squeezed.
- Remove 2/3 cup of the graham cracker mixture and set it aside in a small bowl for the topping. Transfer the remaining crumb mixture to your prepared baking pan and use the bottom of a flat measuring cup or your fingers to press it into an even layer. Make sure to reach all the edges and fill the corners completely. Bake the crust for 12 to 15 minutes until it becomes fragrant and starts to darken around the edges, then let it cool while you prepare the filling.
- Wash and dry the food processor bowl and blade thoroughly. Add the cream cheese and process it, scraping down the sides of the bowl as needed, until it becomes very smooth and fluffy, about 1 to 2 minutes. Add the 1/2 cup sugar, vanilla extract, and 1/4 teaspoon salt, then process for about 15 seconds until combined. Scrape down the sides again, then with the motor running, add the eggs one at a time and process until just incorporated, scraping the bowl as needed.
- Pour the cream cheese mixture over the cooled graham cracker crust and spread it into an even layer that reaches all the edges. Set this aside while you prepare the strawberries.
- Combine the diced strawberries and cornstarch in a medium saucepan over medium heat. Cook the mixture, stirring often, until the berries soften and the juices they release start to thicken slightly, about 4 to 5 minutes. It’s okay if there’s a thin film at the bottom of the pan. The strawberries should look glossy and syrupy when they’re ready.
- Spoon the cooked strawberries evenly over the cream cheese layer, distributing them so every area gets some berries. Sprinkle the reserved graham cracker crumb mixture evenly over the top of the strawberries. Bake the assembled bars for 30 to 35 minutes until the edges are set and puffed while the center still has a slight jiggle when you gently shake the pan.
- Place the pan on a wire rack and let the bars cool completely at room temperature, which will take about 2 hours. Once cooled, cover the pan with plastic wrap or foil and refrigerate until completely chilled, at least 3 hours or up to overnight. When ready to serve, lift the slab out using the parchment paper overhang and place it on a cutting board. Cut into 12 bars using a sharp knife, wiping the blade clean and running it under hot water between each cut for the cleanest slices.
Notes
- Store leftover bars in an airtight container in the refrigerator for up to 5 days. The bars can also be frozen for up to 1 month and thawed in the refrigerator before serving.
- For the cleanest cuts, make sure the bars are completely chilled before slicing. Running your knife under hot water and wiping it clean between each cut makes a huge difference in how neat your slices look.
- These bars are actually better when made a day ahead, as the crust softens slightly and all the layers meld together beautifully. Plan to make them the day before you need them if possible.
- If you want to double this recipe for a crowd, use a 9×13-inch pan and multiply all ingredients by two. The baking time may need an extra 5 to 10 minutes.
Frequently asked questions
Q: Can I use a different type of crust for these bars?
A: Yes, you can substitute a traditional graham cracker crust made with just crackers, butter, and sugar if you prefer. Some people also use crushed vanilla wafers or shortbread cookies. Just keep the same proportions and bake until lightly golden.
Q: Do I really need to cook the strawberries first?
A: Cooking the strawberries with cornstarch is important because it removes excess moisture that would otherwise make the bars watery and prevent them from setting properly. It also concentrates the strawberry taste, giving you more intense berry goodness in every bite.
Q: Can I make these bars without a food processor?
A: Absolutely. For the crust, you can use pre-made graham cracker crumbs and mix everything in a bowl. For the cheesecake filling, use softened cream cheese and beat it with a hand mixer or stand mixer until smooth before adding the other ingredients.
Q: How do I know when the bars are done baking?
A: The edges should be set and slightly puffed, while the center still has a small jiggle when you gently shake the pan. The bars will continue to set as they cool and chill in the refrigerator, so don’t overbake them or the cheesecake layer will become dry and cracked.