
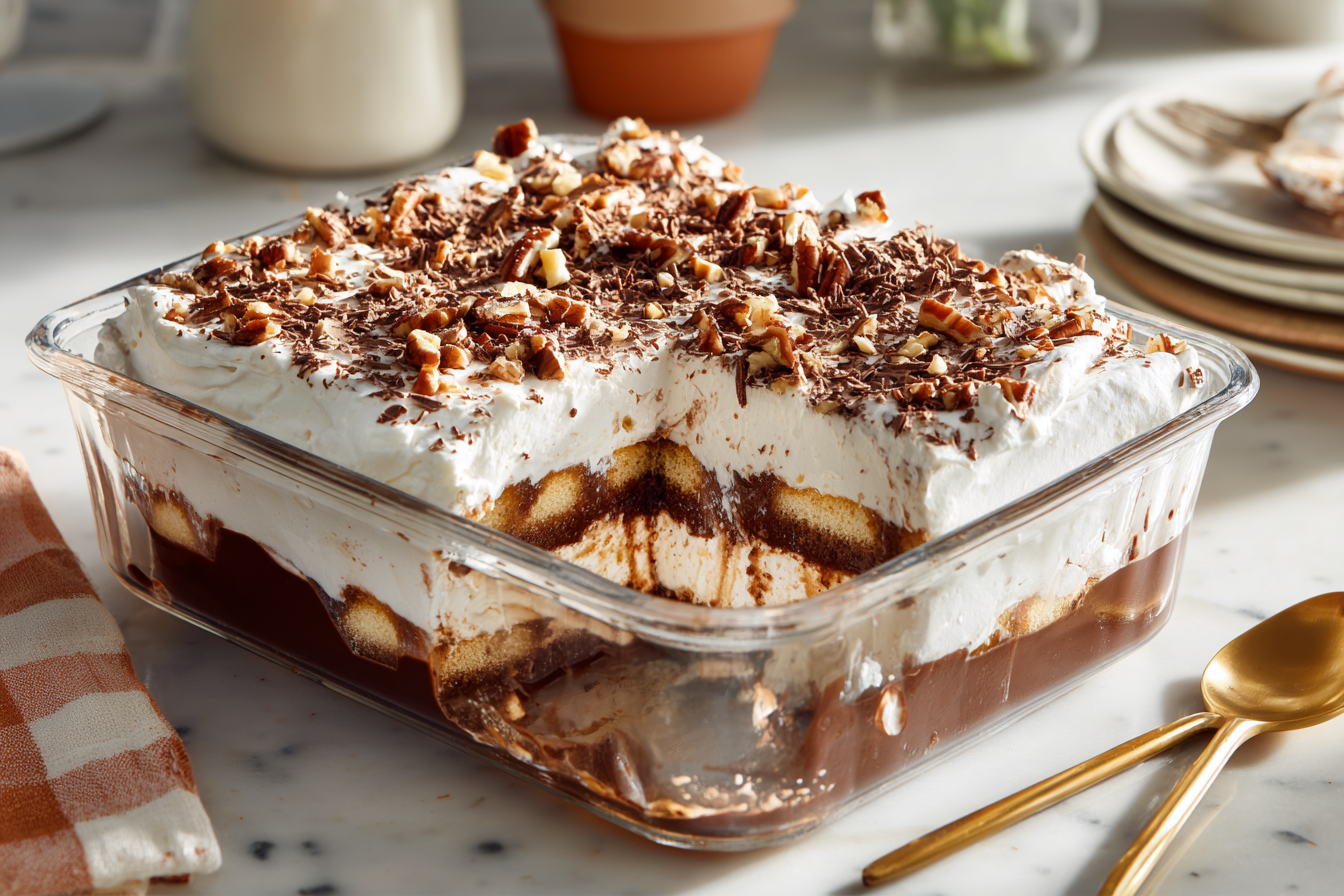
Remember when desserts had names like “Better Than Robert Redford” and everyone at potlucks knew exactly what you were talking about? This retro treat from the 1970s has layers of cream cheese, chocolate pudding, and whipped topping sitting on a buttery pecan crust. It’s rich, cool, and absolutely perfect for feeding a crowd. The best part is you can make it the day before and let it hang out in the fridge until you’re ready to serve. No last-minute stress, just a dessert that looks impressive but comes together with basic ingredients you probably already have.
Why this dessert got named after a movie star
Back in the 1970s, Robert Redford was everywhere. He was the ultimate heartthrob, starring in movies like Butch Cassidy and the Sundance Kid, and apparently someone thought this dessert was just as irresistible. The name stuck, and it became one of those recipes that got passed around at church gatherings and family reunions. You might also hear it called Chocolate Lush or Chocolate Delight, but calling it Robert Redford Dessert is way more fun when you’re bringing it to a party.
The dessert showed up in magazines like Family Circle during the decade when quick, make-ahead recipes were taking over American kitchens. Women wanted something that looked fancy but didn’t require hours of work, and this layered dessert fit the bill perfectly. It’s been making appearances at gatherings ever since, and honestly, it never gets old. The combination of textures and that sweet-salty pecan crust keeps people coming back for seconds.
The pecan crust that holds everything together
The crust is basically a cross between shortbread and a nut cookie, and it’s the foundation that makes this whole thing work. You mix melted butter with flour and chopped pecans, then press it into a 9×13 inch baking dish. It bakes for about 20 to 25 minutes until it’s golden brown around the edges. The butter creates a rich, crispy base that holds up under all those creamy layers without getting soggy, which is exactly what you want in a dessert like this.
Some people swap pecans for walnuts if that’s what they have on hand, and it works fine. The key is chopping the nuts small enough that they mix into the crust evenly but not so fine that they turn into dust. Once it comes out of the oven, you need to let it cool completely before adding the next layer. If you rush this step and add the cream cheese mixture to a warm crust, everything will melt and slide around. Patience here makes the difference between a clean slice and a messy scoop.
Making the cream cheese layer smooth and sweet
The second layer is where things get really good. You beat together cream cheese, powdered sugar, and vanilla extract until it’s smooth and fluffy. Powdered sugar works better than granulated here because it dissolves completely without leaving any grittiness. Then you fold in one container of Cool Whip, which lightens everything up and gives you that cloud-like texture. This layer adds a slight tang that balances out all the sweetness from the pudding and whipped topping that come next.
When you spread this mixture over the cooled crust, use an offset spatula and work gently. Little bits of the crust might want to come up, but just keep going and smooth it out as best you can. It doesn’t have to be perfect since you’re covering it with more layers anyway. Some people use reduced-fat cream cheese to cut a few calories, and honestly, it works just fine. The Cool Whip adds enough richness that you won’t really notice the difference in the final result.
The double pudding layer that makes it extra thick
Here’s where this dessert gets really interesting. Instead of using just one flavor of pudding, you use both chocolate and vanilla instant pudding mixes whisked together with milk. This creates a thick, fudgy layer that’s not quite chocolate and not quite vanilla but something better than either one alone. The pudding sets up pretty quickly, so you want to spread it over the cream cheese layer as soon as you’ve mixed it. It should be thick enough that it doesn’t run all over the place but still spreadable.
The recipe calls for instant pudding, not the cook-and-serve kind, which is important. Instant pudding firms up on its own without heat, and it has stabilizers that help the whole dessert hold its shape when you cut into it. You can experiment with different pudding combinations if you want. Some people do butterscotch and vanilla, or even lemon for a completely different take. The chocolate and vanilla combo is classic, though, and it’s what most people remember from their childhood.
Topping it off with whipped cream and chocolate shavings
The final layer is simple: spread another container of Cool Whip over the pudding layer and smooth it out to the edges. This creates a clean white top that you can garnish however you like. Most people use chocolate shavings made by running a vegetable peeler along the edge of a chocolate bar. You can also sprinkle on some chopped pecans or add maraschino cherries if you’re feeling fancy. The toppings are really just for looks and a little extra texture on top.
Once everything is assembled, cover the dish with plastic wrap and stick it in the fridge for at least two hours, though overnight is even better. This gives all the layers time to set up and meld together. When you pull it out and slice into it, you should see distinct layers that hold their shape on the plate. The Cool Whip keeps everything light and prevents the dessert from feeling too heavy, even though it’s definitely rich. Save adding the chocolate shavings until right before you serve so they don’t get soggy from sitting in the fridge.
How to store leftovers and keep them fresh
Leftovers should go straight back into the fridge covered with plastic wrap or in an airtight container. The dessert will stay good for about three to four days, though it rarely lasts that long once people discover it’s in there. The cream cheese and pudding layers hold up really well in the fridge, and the crust stays surprisingly crisp even after a couple of days. Just keep it covered so it doesn’t pick up any weird fridge smells or dry out on top.
Freezing this dessert isn’t recommended. The Cool Whip and cream cheese layers get weird and watery when they thaw, and the texture completely changes. It’s really best enjoyed fresh from the fridge. If you’re making it for a party, you can prepare it up to two days ahead, which is one of the reasons it became so popular for potlucks and family gatherings. You do all the work ahead of time, then just grab it from the fridge when you’re ready to go.
Switching up the crust for different preferences
If someone in your house has a nut allergy, you can make a graham cracker crust instead. Mix crushed graham crackers with melted butter and a little sugar, press it into the pan, and bake it for about 10 minutes. It won’t have quite the same buttery richness as the pecan version, but it’s still good and it keeps the dessert accessible to more people. Some folks even use crushed Oreos for the crust if they want to amp up the chocolate factor.
Another option is to use a prebaked pie crust if you’re really short on time, though you’ll need two of them to cover a 9×13 inch dish. The homemade pecan crust is worth the effort if you can manage it, though. There’s something about that combination of butter, flour, and nuts that just works perfectly with the creamy layers on top. It adds a texture contrast that graham crackers can’t quite match, and it tastes like an actual cookie instead of just a base.
Other flavor combinations to try out
Once you’ve made the classic version a few times, it’s fun to experiment with different pudding combinations. Lemon and vanilla creates a bright, tangy version that’s perfect for spring and summer. Butterscotch and chocolate gives you a turtle candy vibe that’s absolutely delicious. Some people even do pistachio pudding for a retro look with that pale green color. The base recipe stays the same, you’re just swapping out the pudding flavors to change the whole personality of the dessert.
You can also play around with the toppings. Crushed candy bars, mini chocolate chips, toasted coconut, or even a drizzle of caramel sauce all work great. Just remember that if you add anything wet like caramel, do it right before serving so the Cool Whip doesn’t get soggy. The beauty of this dessert is how adaptable it is. The basic structure of crust, cream cheese, pudding, and whipped topping can handle all kinds of variations while still being recognizably the same recipe that’s been around since the 1970s.
Why this recipe works so well for crowds
A 9×13 inch pan gives you 12 to 15 servings depending on how you cut it, which makes this perfect for feeding a bunch of people without much fuss. Everything is made ahead, so you’re not stuck in the kitchen while everyone else is having fun. It travels well to potlucks because it stays in the pan and you can just cover it with foil. Plus, it’s one of those desserts that appeals to almost everyone. Kids love it because it’s sweet and creamy, and adults appreciate how it’s not too heavy after a big meal.
The presentation is impressive when you cut into it and see all those distinct layers. It looks like you spent way more time on it than you actually did, which is always a win when you’re trying to impress people. The name alone is a conversation starter, especially with older folks who remember when this was the dessert everyone brought to church suppers and neighborhood parties. It’s comfort food with a story, and that’s part of what makes it so appealing even decades after it first became popular.
This Robert Redford dessert has stuck around for good reason. It’s easy to make, uses ingredients you can find at any grocery store, and delivers that perfect combination of textures and sweetness that keeps people coming back for more. Whether you’re bringing it to a potluck or just making it for your family on a random Tuesday, it’s the kind of dessert that never disappoints. Give it a try and see why it’s been a favorite for over 50 years.
Next Best Thing to Robert Redford Dessert
Cuisine: American12
servings20
minutes25
minutes477
kcalThis classic 1970s layered dessert features a buttery pecan crust topped with cream cheese, chocolate pudding, and whipped cream for the ultimate make-ahead treat.
Ingredients
1 1/4 cups all-purpose flour
10 tablespoons butter, melted
1 cup finely chopped pecans
8 ounces cream cheese, softened
1 cup powdered sugar
1 teaspoon vanilla extract
16 ounces whipped topping (like Cool Whip), divided
1 package (5.9 oz) instant chocolate fudge pudding mix
1 package (5.1 oz) instant vanilla pudding mix
3 cups cold milk
1/4 cup grated semi-sweet chocolate for garnish
Directions
- Preheat your oven to 350 degrees F and coat a 9×13 inch baking dish with nonstick cooking spray. In a medium bowl, combine the flour, melted butter, and chopped pecans until the mixture is crumbly and well blended. Press this mixture evenly into the bottom of the prepared baking dish, making sure to get it into all the corners.
- Bake the crust for 20 to 25 minutes until it’s lightly golden brown around the edges. Remove from the oven and let it cool completely on a wire rack before adding any other layers. This cooling step is important because a warm crust will melt the cream cheese mixture.
- While the crust cools, beat the softened cream cheese, powdered sugar, and vanilla extract together with an electric mixer until smooth and fluffy, about 2 minutes. Gently fold in one 8-ounce container of Cool Whip until well combined. The mixture should be light and creamy.
- Spread the cream cheese mixture evenly over the cooled crust using an offset spatula. Work gently to avoid pulling up pieces of the crust. Smooth it out as best you can, reaching all the way to the edges of the pan.
- In a clean bowl, whisk together both the chocolate fudge and vanilla pudding mixes with the cold milk. Whisk vigorously for about 2 minutes until the pudding is thick and smooth. Work quickly because instant pudding sets up fast.
- Immediately spread the pudding mixture over the cream cheese layer, working from the center outward. Use your spatula to spread it evenly and smooth the top. This layer should be thick and fudgy.
- Spread the remaining 8-ounce container of Cool Whip over the pudding layer, creating a smooth white top. Make sure to spread it all the way to the edges so every slice will have all the layers visible.
- Cover the dish with plastic wrap and refrigerate for at least 2 hours or overnight to let all the layers set up properly. When ready to serve, garnish with grated chocolate and optional chopped pecans. Cut into squares and serve cold directly from the refrigerator.
Notes
- If you can find 12-ounce containers of Cool Whip instead of two 8-ounce containers, use half in the cream cheese layer and half for the topping.
- For a nut-free version, substitute the pecan crust with a graham cracker crust made from 2 cups crushed graham crackers mixed with 6 tablespoons melted butter.
- You can experiment with different pudding combinations like butterscotch and vanilla, or lemon and vanilla for a different twist.
- This dessert does not freeze well as the texture changes when thawed, so plan to keep it refrigerated and serve within 3-4 days.
- Add the chocolate shavings right before serving to prevent them from getting soggy in the refrigerator.
Frequently asked questions about Robert Redford dessert
Q: Can I make this dessert without nuts?
A: Absolutely. You can substitute the pecan crust with a graham cracker crust by mixing 2 cups of crushed graham crackers with 6 tablespoons of melted butter and a tablespoon of sugar. Press it into the pan and bake for about 10 minutes. It won’t have quite the same buttery richness, but it’s still delicious and makes the dessert accessible for people with nut allergies.
Q: How far ahead can I make this dessert?
A: You can make it up to two days before you need it. Just keep it covered in the refrigerator until you’re ready to serve. The layers hold up really well and actually taste better after sitting overnight because everything has time to set properly. Just wait to add the chocolate shavings on top until right before serving.
Q: Can I use homemade whipped cream instead of Cool Whip?
A: It’s not recommended because homemade whipped cream doesn’t have the stabilizers that Cool Whip has, so it tends to break down and get watery after sitting in the fridge. Cool Whip is specifically designed to hold its shape in desserts like this, which is why it works so well. If you want to use real whipped cream, you’d need to add gelatin or another stabilizer to it.
Q: Why did my layers get mixed together instead of staying separate?
A: This usually happens when you add the cream cheese layer before the crust has cooled completely, or when you spread the pudding layer too roughly. Make sure each layer is set before adding the next one, and work gently with your spatula. Also, instant pudding should be thick before you spread it, so give it a minute or two after mixing to firm up slightly.